
Hi there! Today I want to share with you a written version of my video of painting a portrait of Tai Lopez.
To check out the full video tutorial on YouTube, click here:
Portrait Painting in 3 Colors | Tai Lopez
I did this portrait using a limited palette of three colors only:
- Phthalo Blue
- Quinacridone Rose
- New Gamboge
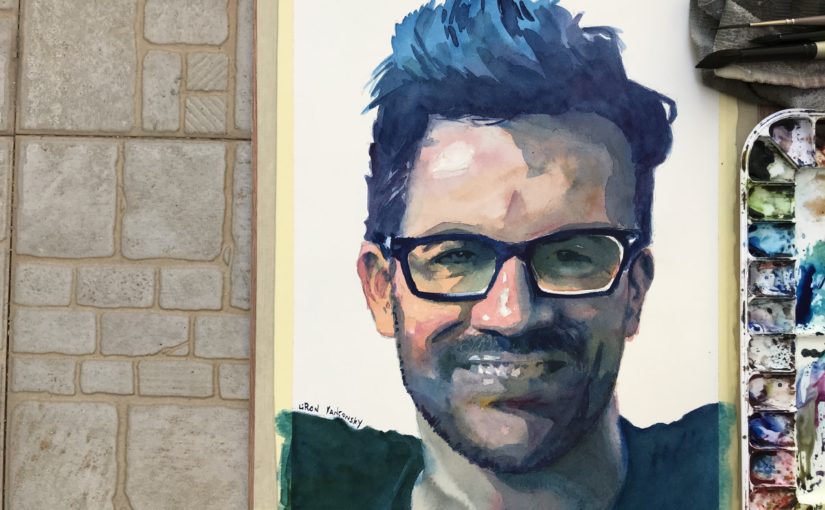
Final result
As mentioned, you can check out the full video tutorial on YouTube:
Portrait Painting in 3 Colors | Tai Lopez
If you want this in written format, go on ahead 🙂
Portrait Painting in 3 Colors | Tai Lopez
First wash
So I start off with a very detail drawing showing all of the changes in values.
I desaturated and posterised the reference image to make it easier to see the value shifts.
I make sure to mix a very large quantity of paint for the hair, as it takes up a lot of space and I sometimes run out of paint easily 
The next step is starting the wash.
Now, I got lucky and his glasses are super dark.
This allows me to use them as a “checkpoint” or a break for the wash.
It makes life easier, because I can have better control of the different sections.
You don’t have to do it this way.
You can simply pull the wash over everything (avoiding the highlights of course).
However I chose to do so in the spur of the moment.
Next up I continue to pull the wash down.
At this stage I’m done with the initial wash.
Notice how I strongly contrasted his shirt with the skin tone.
This was important for me, for creating an interesting color harmony / composition.
Second wash
At this stage I’m concerned with two things:
1. Edges – getting a variety of rough and soft / blended edges.
(you can notice that especially on the forehead).
2. Preserving the “second tier” of highlights.
Here I’m pulling the wash down to the very bottom.

Third wash
And now I’m moving on to the 3rd wash.
The reason I’m going through so many, is that I wasn’t able to get the impression I wanted right away.
Sometimes I’m able to nail most of the value variation in the first and second washes, but this time was more challenging for some reason.
Now you can see how and why I used the glasses as a pausing point for the first wash.
They are so much darker then the rest of the face, that the break in the wash won’t be visible.
The disadvantage to this is that I have to go over them several times, as they are painted over the white paper (and it’s hard getting such darkness with one layer).
Fourth & fifth washes
Here I finally added the eyes – which also have quite a dark value.

And now I’m adding the mid values (I didn’t go dark enough in the first 3 washes, as mentioned earlier).
Final result
And finally I’m just going over some dark areas, and we are done!
I hope this was helpful!
If you are interested in the full video tutorial, be sure to check it out here:
Portrait Painting in 3 Colors | Tai Lopez
Let me know if this is helpful.
I tried really generalising the stages so it won’t turn into a 30+ stages tutorial haha.
All the best!
– Liron