Don’t Listen to ANYONE but Yourself! Advice for Ambitious Artists | Liron’s Podcast Episode 77

In today’s episode we talked about ignoring the noise, and learning who to listen to.

Here’s a summary of the episode, as well as the links mentioned.

What Selling at Fairs Taught Me

First I talk about how I came to think of this topic.

When I just started selling my art at the local fair, several artists made discouraging remarks about selling paintings there.

I then came to realize this happened all throughout my career. People seem to wonder whether there’s money in art, and be quite cynical towards the topic.

The Underlying Limiting Belief

These people basically communicate their own shortcomings and limiting beliefs (unless done maliciously).

They feel insecure about selling their art.

I have a lot of empathy for artists, but I have a strong aversion to the forcing of your own limiting beliefs upon others.

I think it’s important NOT to do that.

Which is why I also don’t think there are many people you should listen to.

Who Should Your Listen To?

I would say two things:

1. People who are actually succeeding at what you want to do.

These are great, and also perhaps more generally people who are positive and have a clear aim and vision for their future.

2. The market.

By the market I mean the whole sum of your potential customers. The average of all of them. Could be millions of people.

The market’s response to you will always speak the truth. If you aren’t successful as many paintings as you’d like – the market is telling you something.

Maybe your art isn’t good enough. Maybe it’s too expensive. Maybe it’s too CHEAP. Maybe it doesn’t fit the venue in which you try and sell it.

The good thing about the “market” is that it really is the average. It may be contentious, but I do believe this is one of the cleanest feedbacks you can get.

If a product fails, there’s a reason for it.

And that feedback is actually very valuable! It will help you sell more works, if you choose to listen to it.

Conclusion

So this is it for this one!

It takes time to learn who to listen to, so be open but stay on your path and believe in your own vision (another topic I have to cover in an upcoming episode.

And now, let us move into the Artist Corner!

Artist Corner – Alex Ross

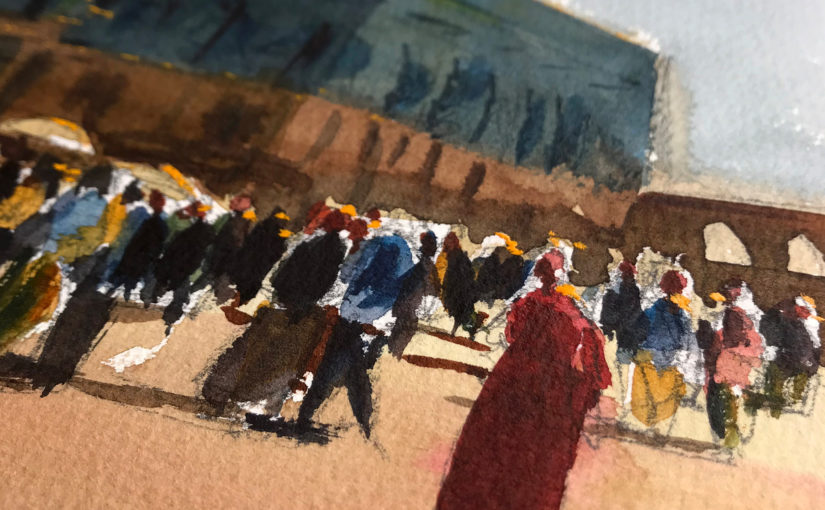
Today I talked about Alex Ross, an American comic book writer and artist.

He worked with both Marvel and DC, and what really attracted me to his work is the one done in watercolor!

It’s fascinating for me to see watercolor used in a way I’m less used to. You can watch a REALLY AWESOME video of his here: Alex Ross Video

And check out his website here: Alex Ross’s Website

And Here’s where you can find me

Check out my YouTube Channel – Liron Yanconsky

Or ask me questions on Instagram – @LironYanIL or Snapchat – @LironYan3

I hope you enjoyed this one. Take care, and we’ll talk again really soon,

— Liron

Should You Mix Watercolor Paint Brands? Painting Advice!

In today’s episode (76) of my podcast, I want to answer a question I received several times – Should you mix multiple watercolor paint brands?

The Importance of Watercolor Brands

The question at hand may be tactical, but my answer is also an indication of my general approach to painting and art.

I always try focusing on the 20% that matters. I do that in my art, business and hopefully in life.

There’s always a lot of noise and clutter around what’s really important.

Watercolor painting is already complex as it is – so I’m always trying to simplify the process as much as possible. This is also why I’m a huge fan of using a minimal palette.

Paint > Brand

The quick answer is that I care FAR MORE about the specific paint and its usefulness to me, rather than the brand.

I personally find most (ARTIST GRADE) paints mix well, regardless of brand.

There are certain things you want to be aware of (that I further elaborate on in the episode), such as:

  • Producing a large variety of values
  • Artist grade VS student grade
  • Single pigment / multiple pigments
  • Granulation
  • Lightfastness

I hope you find the explanation in the episode helpful, and that it allows you to change your focus from specific brands and into specific paints.

And by the way, if you want to watch the video from which I grabbed the audio for this episode, be sure to check it out here:

And with that, it is time for the Artist Corner

Artist Corner – Jennifer Branch

Today I showcase Jennifer Branch, a watercolor painter from Georgia, US.

I love her simplistic impressionistic painting style, as well as focus on happy colors.She has a way of simplifying a scene in a skilled way that preserves its original essence.

Some of her work reminds me of Shari Blaukopf’s work, although the latter’s work has more of an “urban sketching” vibe to it.

Be sure to check out Jennifer’s work here: Jennifer Branch’s Website

And Here’s where you can find me

Check out my YouTube Channel – Liron Yanconsky

Or ask me questions on Instagram – @LironYanIL or Snapchat – @LironYan3

I hope you enjoyed this one. Take care, and we’ll talk again really soon,

— Liron

How to Draw a Clenched Fist

Hey friends!

In this drawing lesson I’ll show you how to draw a clenched fist!

The key takeaway here is to try to simplify the shape of the hand, and use simple guidelines that will eventually turn into more complex shapes.

Check out the drawing lesson here: How to Draw a Clenched Fist!

Pay attention to the thumb, and how it obstructs some of the fingers.

Also, the main challenge in drawing the hand here, was getting the correct shape of the inner parts of the fingers.

Notice how they are bent downwards, and into the center of the palm.

I hope this was helpful!

If you enjoyed this video lesson, let me become your personal, on-email, drawing teacher (=

You can do that, for FREE, right here

You’ll also receive a gift book (=

how to draw a clenched fist

I hope to hear from you soon!

– Liron

How to Draw an Open Hand / Palm!

Hey friends!

Today we have another fun anatomical drawing lesson.

In this drawing lesson, we’re going to learn how to draw an open hand!

Drawing the human hand is an awesome challenge, that calls upon your ability to actually KNOW some anatomy, and UNDERSTAND how the human body works.

Check out the video, and I’ll share some of the key points afterwards.

I hope you enjoyed the video.

If you need some reference for drawing hands, check out these two images on drawing hands in different poses, and holding objects.

Key tips on how to draw an open hand:

1. Pay special attention to the fanning of the fingers.

Remember, the fingers aren’t straight, parallel lines that stick out of the hand.

The are fanning out of it. I show this really well in the video.

A good method of getting this right, is by drawing those circular guidelines. Draw one for each knuckle in the hand.

2. The overall shape of the hand.

Notice how the wrist is thin, and expands as soon as it “turns” into the hand itself.

Use curved lines to represent the sides of the hand, which have more fat in them.

3. Careful with the thumb.

The thumb can be quite a challenge, so be sure to get its direction properly.

Also remember that the base of the thumb, which is the part that’s connecting it to the hand, is also quite fat.

4. Knuckles!

It’s important to hint the presence of the knuckles. This is especially true when talking about the knuckles at the very base of each finger.

A good way to indicate the knuckles is using shading. I find this works better than just drawing them boldly.

And there you have it! A relaxed open hand.

I hope this drawing lesson helped you.

If you haven’t already, get a gift from me by subscribing here. You’ll get my awesome tips and advice. You won’t regret it (;

3D-Cover-PNG-DS2

And I’ll talk to you soon.

– Liron

How to Draw Shay Cormac VS Adewale (AC Rogue)

Hey there!

Today I want to do something special.

In this video I show you how to draw a battle scene between Shay Patrick Cormac and Adewale – two characters from the Assassin’s Creed Rogue video game.

This is less of a drawing lesson, and more of a speed-drawing demonstration of my complete drawing process.

You’ll see everything from drawing, to painting (watercolors AND colored pencils) and inking.

So without further ado, here it is!

A few notes:

1. I like to paint before I ink.

This is something I talked about before.

This type of process allows the colors to really shine, and then also allows you to be minimal with your pen and ink.

2. I mix watercolors with colored pencils.

I like the look I achieve by applying watercolors and then completing the look using colored pencils.

This is a common practice, and is my favorite way to go. The watercolors easily cover large surfaces and give the base tone. Then, the colored pencils add the texture and more accurate shading.

However, you are invited to try a different way, and let me know if it works better for you (=

Anyway, this is it. Let me know if you have any questions!

And if you want to become a king at drawing, inking, painting, sketching and whatnot, be sure to subscribe here. You’ll also receive my book as a gift! (=

3D-Cover-PNG-DS2

I’ll talk to you soon,

– Liron