In this episode of my podcast I’m talking about creating indoors VS outdoors. I elaborate on how these are different, and what the benefits are of doing both.
I focus mainly on the implications for visual artists – painters, sketchers, sculptors and so on.
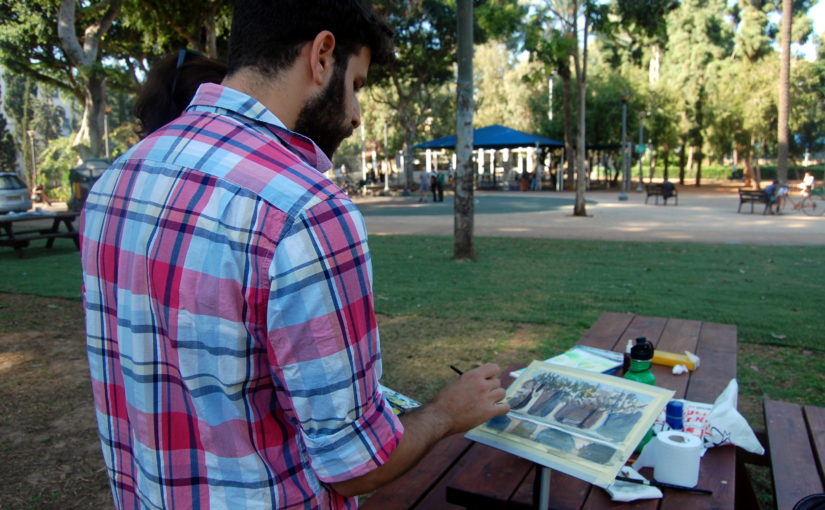
Working outdoors is messier, more dynamic, full of changes, distractions and so on. However, it’s much more immersive, and sucks you into the scene.
Working indoors is cleaner, more well-organised. But it does take you out of the environment to some extent, and “weaken” some of your senses and perception.
I believe you can get the most benefit by practicing to alternate between the two. This means working outdoors, and then indoors.
I also aspire to do both. That way my skills in one are will flow to the other.
Artist Corner
In this episode I mention James Gurney. He is an amazing artist and creator, most well know for creating the Dinotopia book series.
But the reason I personally love him is his tutorials on YouTube, where he paints mostly with gouache paint. This actually got me really interested in gouache myself, and I’ll probably give it a try in the future!
Be sure to check out his YouTube channel here: James Gurney
In this episode of my podcast we’ll discuss how to master an artistic field or endeavor, using macro and micro skills.
Micro Skills – The How
Another word for these would be “techniques”. This is the technical know-how of your artistic field. In watercolor, this means blending edges, matching values and dry brush techniques.
In drawing, this can be properly holding the pencil, creating a gradual shift in values and so on.
Mastering these is pretty straightforward. You practice them until you are competent.
Macro Skills – The Why
This is where the challenge begins.
If the micro skills were the “how to”, the macro skills are the “why we do things the way we do them”.
These can include composition, color selection, arrangement, telling a story or explaining an idea through our art. They also include work-process-related ideas.
This is less of a thing to “work on” in a targeted manner like the micro skills. A lot of this comes down to lots of experimentation and being open and present during the creation process.
I want to emphasise once again – these CAN improve – by practicing correctly.
My Progress With Watercolor Painting
I feel like I’m at a spot where I’m very competent with the micro skills. I wouldn’t say I MASTERED them. But I’m pretty good.
And with the macro skills? I feel like I’m still learning. And there’s A LOT to learn. This pleases me, because it shows the huge potential I can still tap into.
And the way I see it – mastering both micro and macro is the recipe for magic.
I hope you enjoyed this one!
Show Notes
I mentioned Jack Hamm’s book: Drawing Scenery. Here’s a link to purchase it on Amazon (affiliate): http://amzn.to/2Au2VsP
A few days ago I published a YouTube vid that I think a lot can benefit from.
I want to share some highlights in this post.
If you want to watch the full video, you can check it out here:
The Stages of Watercolor Painting
When I got started in watercolors, I ran into some issues I couldn’t find a solution for.
They mainly revolved around the actual process of painting, on a macro level.
What should I start with?
Do I cover everything up in the initial wash?
Should I use wet-in-wet? When?
This video and tutorial are my attempt of answering some of these questions.
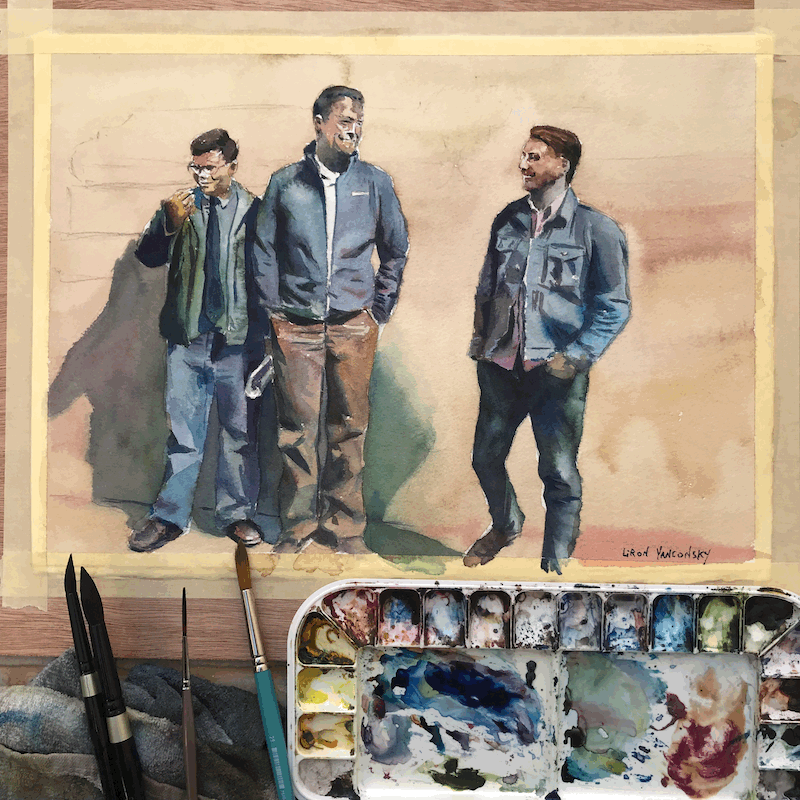
I’ll do this using this painting’s process:
So let’s talk about the different stages of watercolor painting…
Introduction
This is MY personal approach. I encourage you to learn from it, and then seek out advice of others.
This way you’ll learn what works best for YOU, and what’s most suitable to your style and desired final result.
I personally like to finish a painting in as few layers as possible.
This means I don’t do a huge amount of glazes. I usually wrap a painting up in 3-5 layers.
Also, as I like to make the most out of each layer, I make a lot of use of wet-in-wet and lifting when necessary.
I do these in every layer, as I see fit.
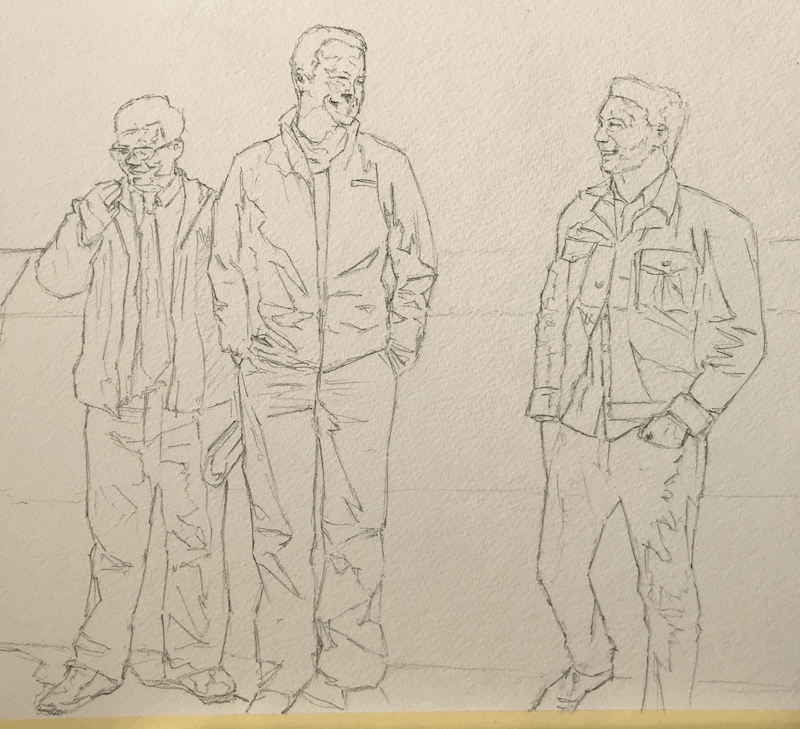
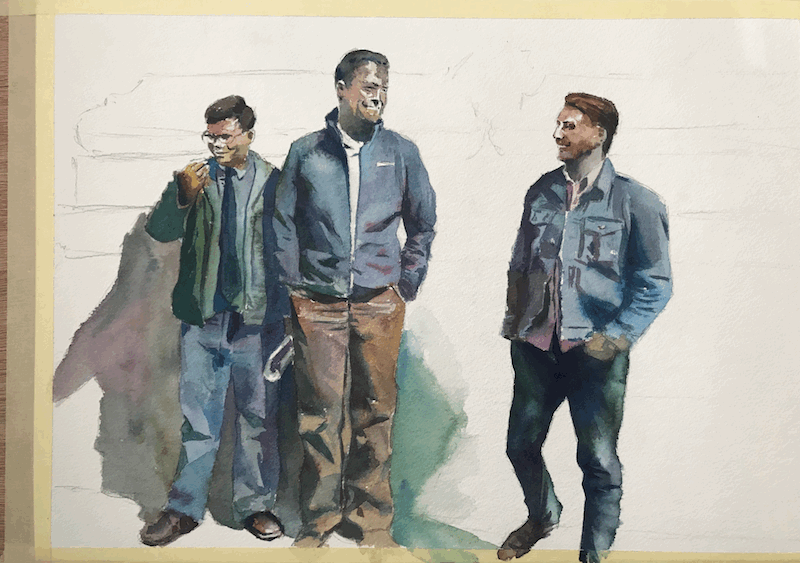
So here’s the initial drawing, ready to be painted.
My approach to this is going to be fairly simple.
The figures are my focus of attention.
The background is going to be secondary and simplistic.
This is why I decided on first painting the figures fully, and only then attending to the background.
Every “type” of painting is going to be different.
If this was a landscape painting, my initial wash would have probably covered much more of the paper.
More on that near the end of the post, under Conclusion…
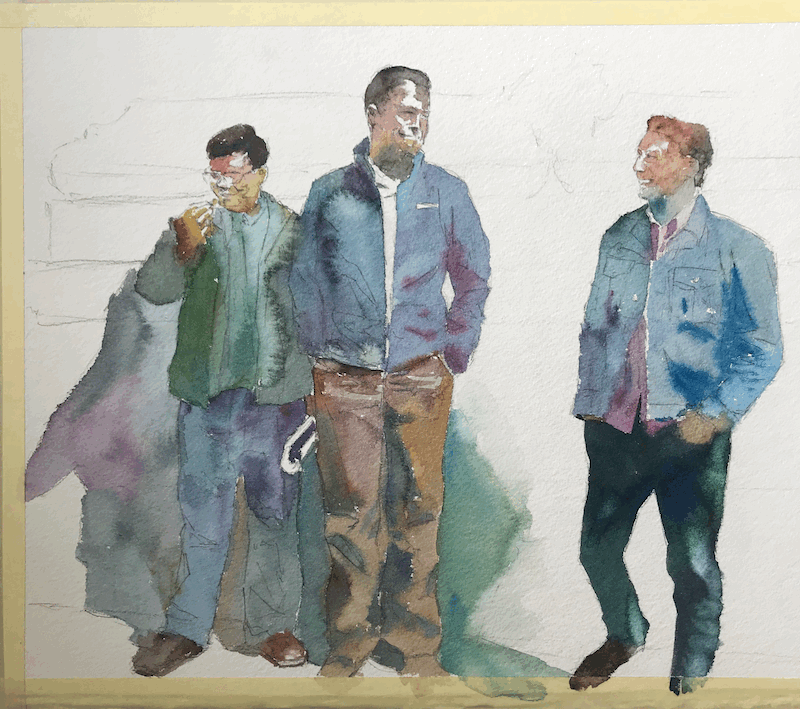
The first stage is the initial wash.
The Initial Wash (AKA First layer)
This is the first layer we will paint.
With this one, my main concern is to keep things flowing and even.
I don’t care about the colors mixing into one another.
I know I can tighten things up and even correct some mistakes in the next washes.
This is what my initial wash looks like.
Do you see all the blooms and cauliflowers?
This is cause by wet paint “bleeding” into a somewhat dry paint.
I really don’t care about it!
The first wash, to me, is adventure time. This is perfectly fine.
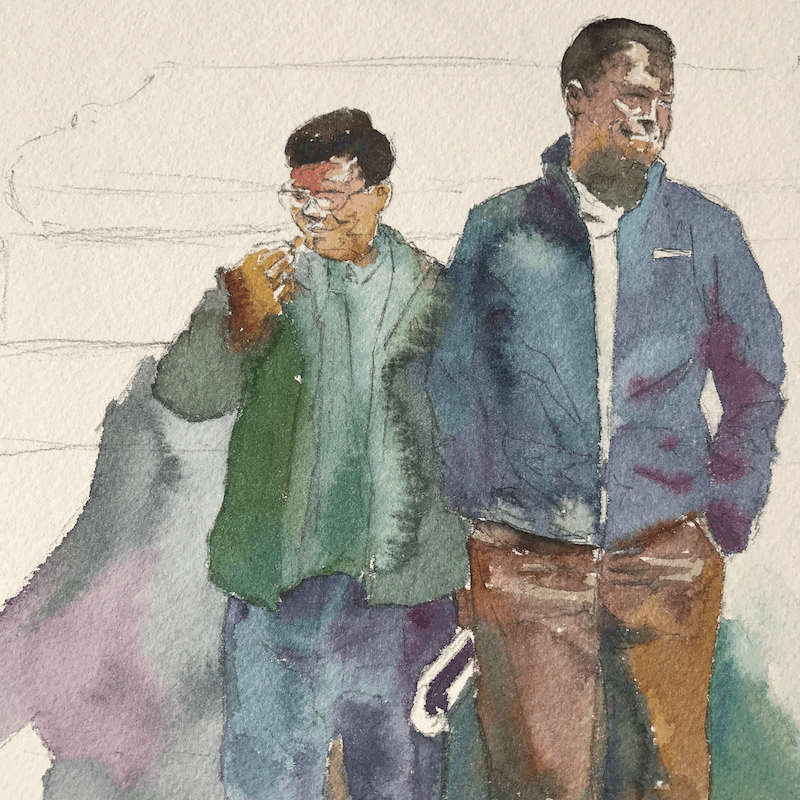
Here’s a close up of how some of the colors blended.
I’m really pleased with this result.
The 2nd Wash
This is the time to paint in all the mid-values.
This is basically everything that’s darker than the initial wash.
Here’s my 2nd wash for this one.
I usually find this to be the most difficult wash.
This is because this one REALLY sets the tone for the entire painting.
It’s a really important one that will start building the shapes of the people in the painting, as well as the feeling of light and shadow.
The 2nd wash also demands more attention to edges.
You want a nice mix of soft and hard edges. This really helps create interest.
Here’s the 2nd wash done.
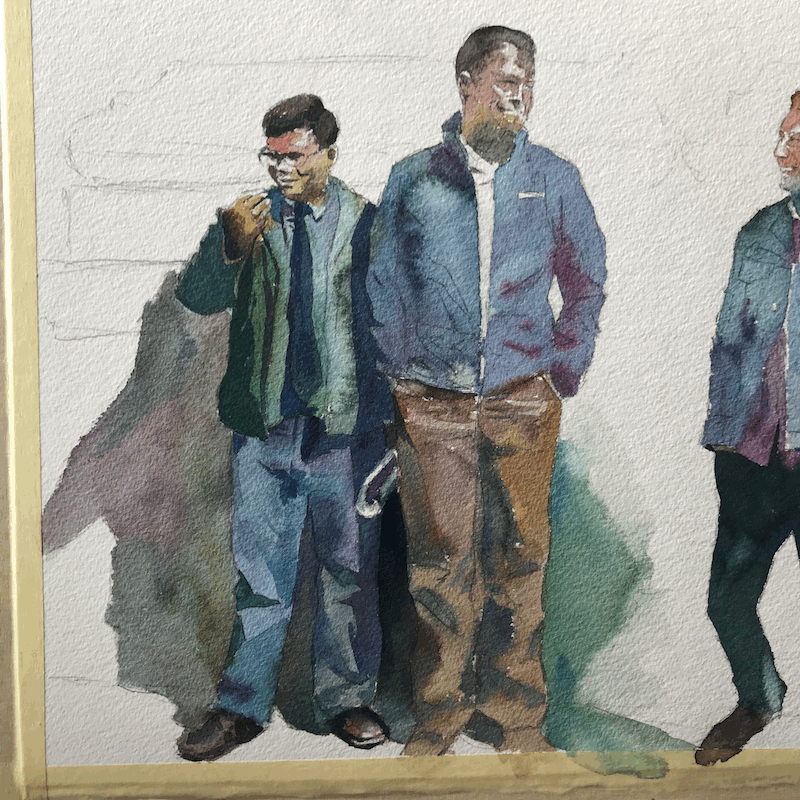
The 3rd Wash
This is the time to put in the richest, darkest shadows.
You will probably also go over many areas you already covered earlier, in the 2nd wash.
You want to make sure to push the value range as much as necessary.
Most realistic scenes have a very wide range of values, from the lightest whites to some really dark blacks.
Notice how this stage really makes things pop.
This is because by painting the shadows, we actually paint the lights and highlights.
4th Wash and Beyond
For me, this stage is for darkening things that are supposed to be darker.
At this point I also add some final details that perhaps I didn’t get the chance to so far.
In this particular painting, all I did for the 4th wash was to add that background.
And we are done!
Conclusion
This is it for the process.
I want to mention something important. Every painting is different.
I use different approaches for each painting, and for every “type” of scene.
So for landscapes, I’ll probably cover everything up.
For portraits or people, I’ll probably work on them and only add the background in the end.
With time, you’ll learn what works best for you, for each type of subject and painting.
It’s almost like you’ll have a blueprint for each type of painting.
If you are a beginner, don’t worry.
This will come with time and experience
I hope you enjoyed this tutorial.
If you have, make sure to check out the full video to see more of the process: The Stages of Watercolor Painting
And this is it!
Let me know what you think in a comment below.
Is this similar to your approach?
Do you treat the stages differently?