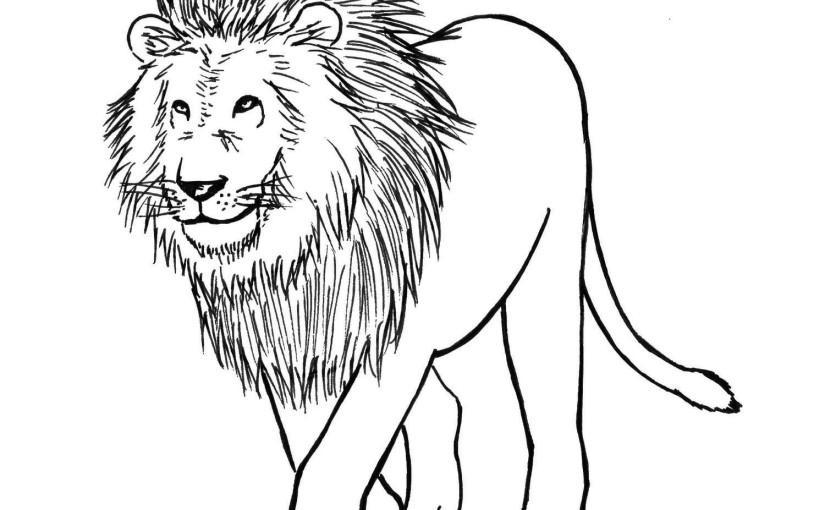
In this drawing lesson you’ll learn how to draw a LION! We’ll go at it step by step, so that you can understand everything.
How to Draw a Lion – step by step
Step 1 – The head and the mane
You can see I drew the head, together with two guide lines that will later tell us where the center of the lion’s face is.
Notice how the lion is turned to our left.
I also drew a mane. This is really simplistic, because the details will be added later with a black pen. It is important, however, that you get these shapes correctly, so the drawing looks cool eventually!
Step 2 – The second mane:
Here you can see I added a second mane. I notice after studying the way lions look, that they have what appears to be two manes. One is around their head, and the other one is bigger, usually darker, and reaches more to the back of their bodies.
Step 3 – Adding the body:
Here I added the body. Just like the head, it is turned to our left.
Also, some foreshortening is occurring here.
Step 4 – The legs and paws:
Here I added the legs, and lightly indicated the paws with square-ish forms, that will later be turned into rounder forms with the inking. This was the most challenging part for me, and it also challenges me in drawing the human body.
The best advice I can give you is to study further how lion’s / other big cat’s limbs look.
Step 5 – Details, details, details….
Here I added the details to the head and feet, as well as drawing a tail. This step, especially the face, will help us later on to ink this beast in a cool and correct manner.
Steps 6-8 – Inking
This is the inked lion. The body didn’t change much, but look at the face, manes and paws.
First, I added the details of the face. The nose sits in the dead center we marked earlier, and from there you get to the rest of the face.
The manes now look like manes! And the paws have been rounded up, and had nails added to them. This is basically all the details necessary.
And after erasing the red pencil…
Voila!
Your big, bad, brave and cool lion!
That’s it for this drawing lesson.
Please remember to SUBSCRIBE HERE to get my eBook for free + great tips and advice on drawing, delivered straight to you! (=
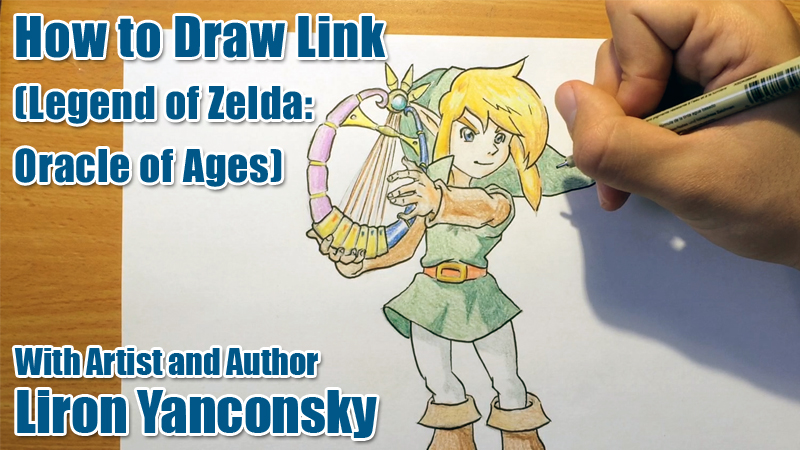
In this drawing lesson I’ll teach you how to draw Link from The Legend of Zelda. As an added bonus, we are going to draw Link in his Oracle of Ages version! (=
Check out the video of part 1. When you are done, either move on to part 2 and 3, or read on for an entire breakdown of the steps for the three videos.
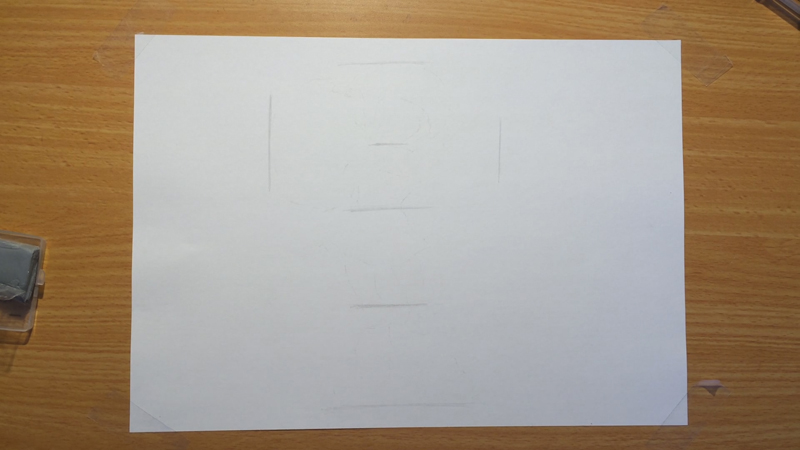
Guidelines
Our guidelines here are very simple.
From top to bottom, I divided the area into two “halves”.
The reason why I use quotation marks is that there is a 40-60 relation. The top “half” takes up 40%, while the bottom takes up 60%.
Then, I divided each of these halves into real halves.
I also added two lines at the sides, representing the borders of the drawing.
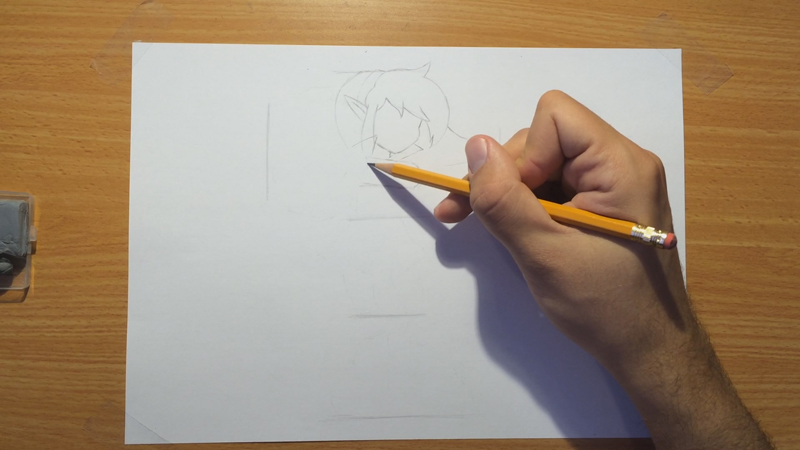
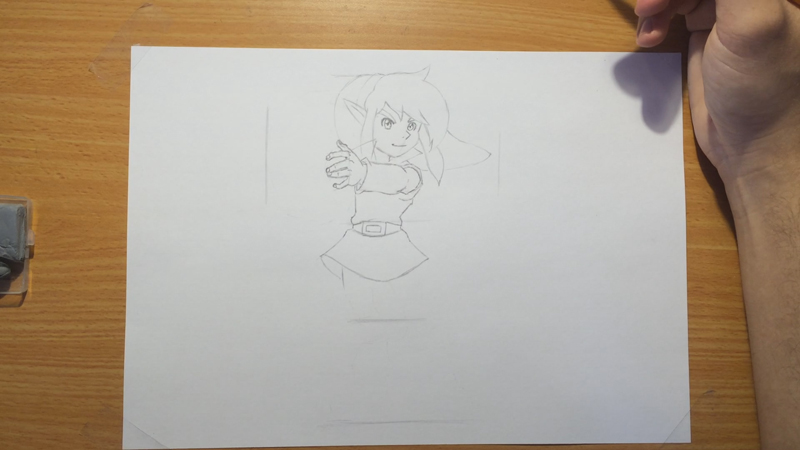
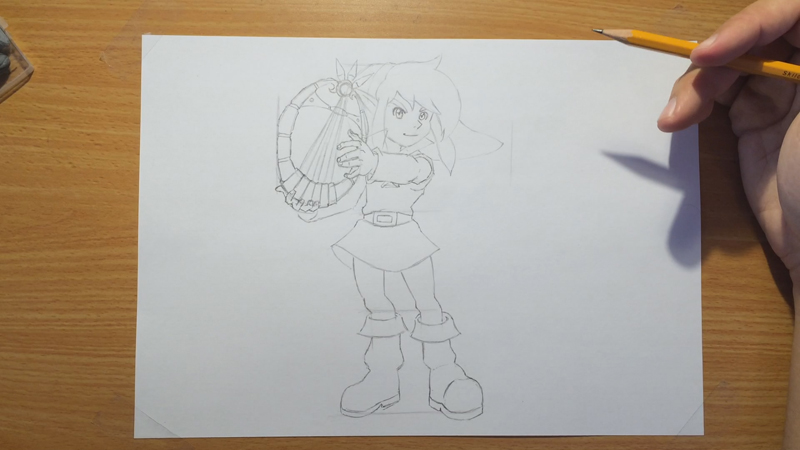
Next, let’s start drawing Link’s head.
The head takes up the top most quarter.
His head is looking to our right side, and so there is a slight tilt. It’ll become more noticeable when we add the face itself.
Notice how his hood / cape is flying to the right.
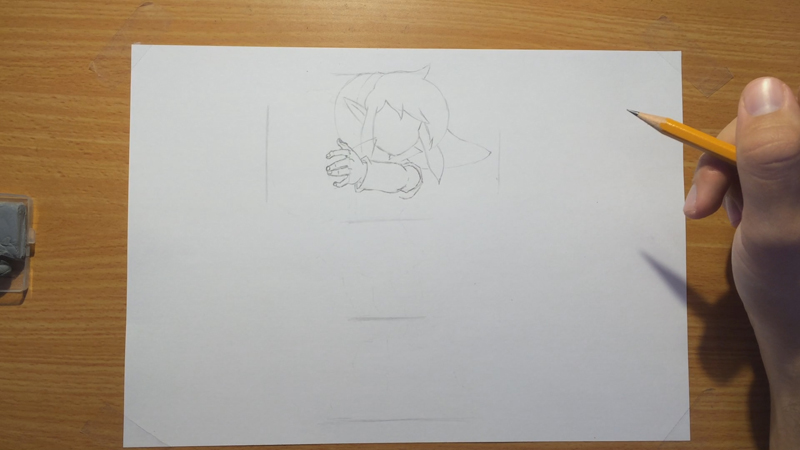
Now let’s add his left hand, which is playing the harp of ages (=
The fingers here can be a real challenge. I notice how in this poses, it seems like the middle and ring fingers are closer together than the rest of the fingers.
Also notice how the fingers are rounded.
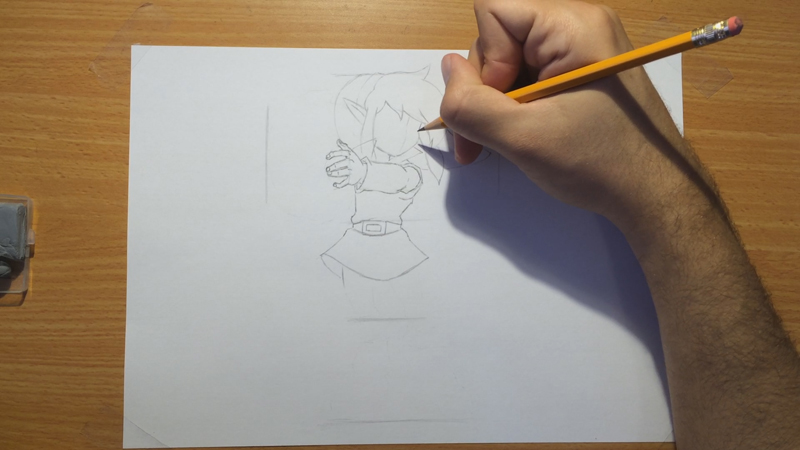
Next, let’s start indicating the upper part of the body.
The important thing here is to understand how his belt is pressing down his clothes.
This creates these small bulges around Link’s waist.
Next, we’ll draw Link’s face.
There are two main things to remember here.
#1 – Link’s head is rotated to our right.
This makes his nose point to the right. It also means his left eye (right eye from our side) will appear to be a little smaller, because it’s “moving away” from us.
#2 – Keep things light.
With faces, especially in the manga and Japanese-styled art, you really want to keep things simple.
Drawing too many details, or drawing lines that are two strong, will lead to bad results. You want to draw this part very gently.
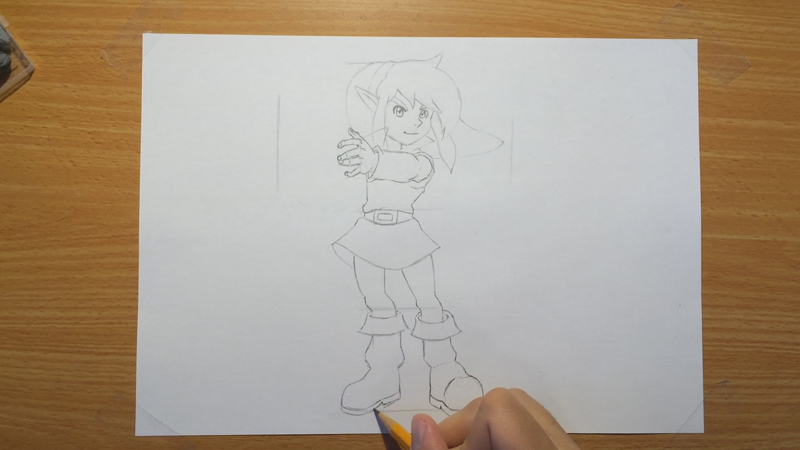
Now, let’s add the legs and boots.
I found the legs to be challenging, but I used reference for the entire drawing so that made things simpler.
Make sure to get the knees pointing in the right directions. Notice how I drew the left knee pointing left, and the right knee pointing right.
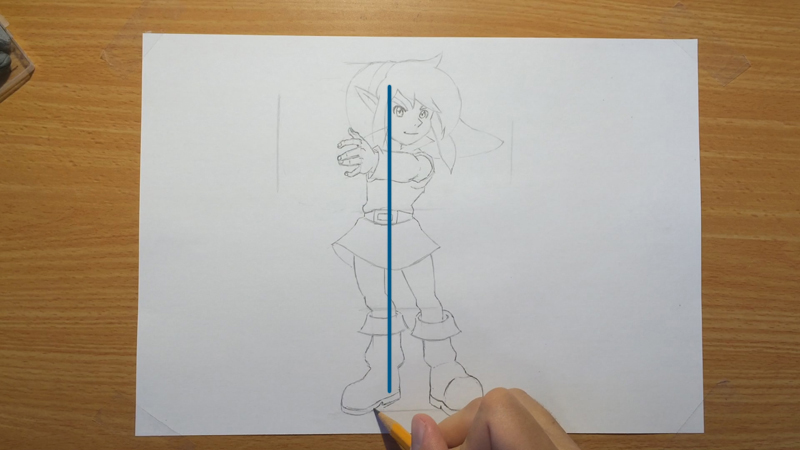
Also, notice how most of his weight is supported by his left (our right) leg.
You can see that this is his center of weight, because you can actually draw an entire straight line all along his left foot, and throughout his entire body.
Here is an illustration of this.
Also, notice how his boots are unproportionally huge, so get that in as well =P
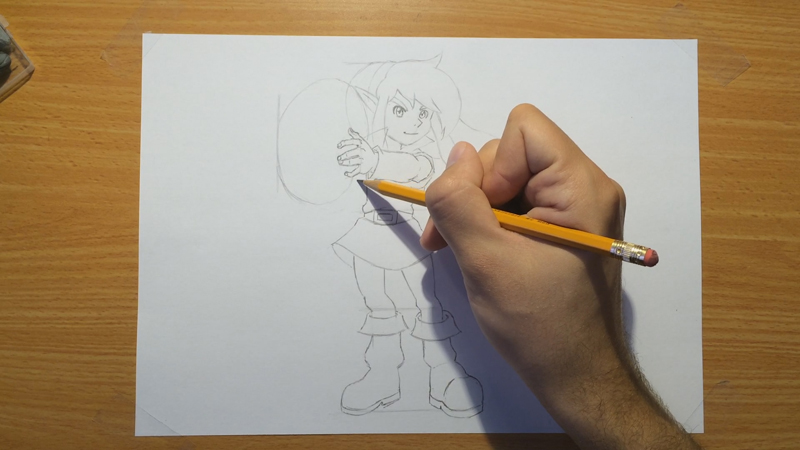
Next, we’ll draw the harp.
Now, because it is highly detailed, we want to first indicate it using simple lines. It’s main shape is a circle.
Let’s get that in:
Now that we have the basic shape, let’s add the details according to the reference.
Here we go!
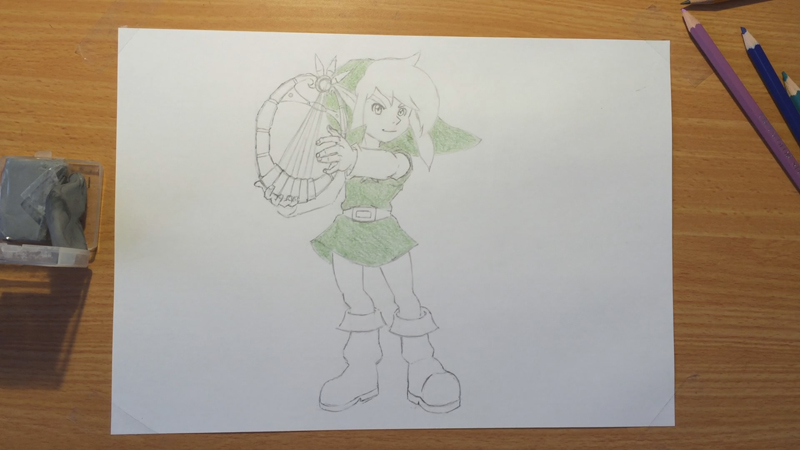
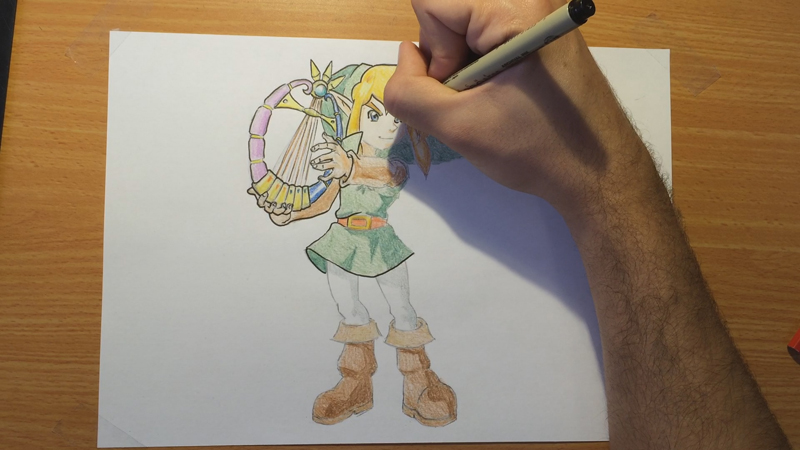
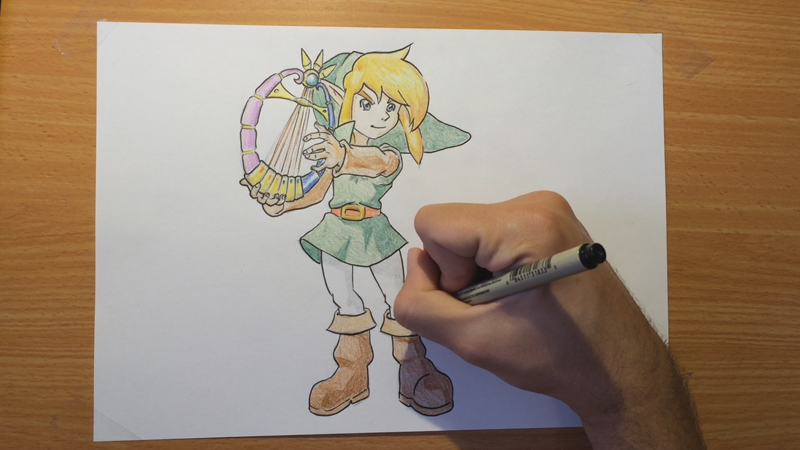
Now all that’s left to do is color and ink.
I tend to first color, and only then ink. I learned that trick from Mark Crilley.
So I begin by applying a first layer for each color I’ll be using. I am using colored pencils for this example, as I want to keep it simple.
Here is the first layer for Link’s Tunic’s green.
Noting too fancy here. I simply colored ALL that is green!
Next, I draw a first layer for the rest of the colors in this drawing.
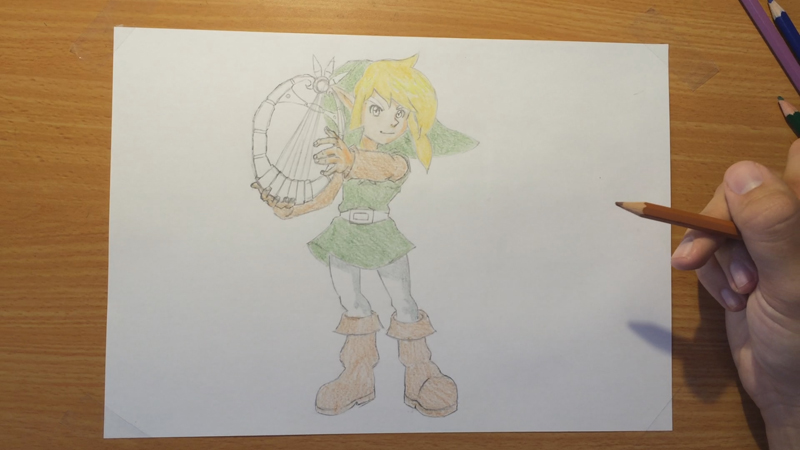
Now it’s time to add the second layer, that will be darker, and will create the shades.
In order to do that, we need to set up the light source, and understand where we need to shade.
I jumped the gun earlier by shading the right sides of his legs, so we will go with that direction.
Let’s go ahead and color that second layer.
There we go! What do you think?
Notice how that second layer made the drawing POP, especially the highlights of the hair.
Also take a closer look at the harp. I left a part of the blue section entirely white. This creates a nice shiny effect.
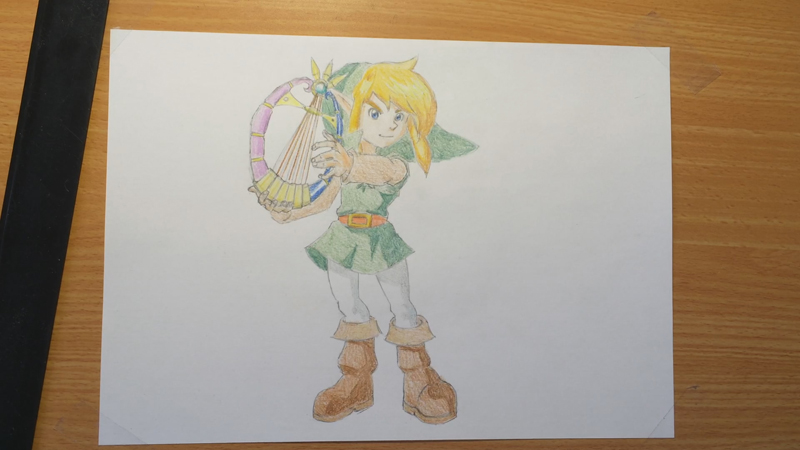
Now we can finally ink Link!
I’ll start working from left to right, making sure I don’t smear my own lines.
I’m drawing the lines as quickly as possible. Takes some skills – practice makes perfect!
Because I colored first, I don’t even have to go over ALL lines. I can pick the important ones.
Also, I make sure I use different widths of lines, in order to get an interesting look. Some lines I make thick, others very thin and simple (especially around the face!).
And we are done!
I’ll probably create more video tutorials and articles on additional characters from The Legend of Zelda, and specifically Oracle of Ages (I LOVED that game).
Thank you so much for reading. Feel free to leave a comment or a question below, and I’ll answer everything!
Also, don’t forget to SUBSCRIBE to my blog (ON THE LEFT), or via my Get Awesome Stuff page!
You’ll get my eBook for free + great tips and advice on drawing, delivered straight to you! (=
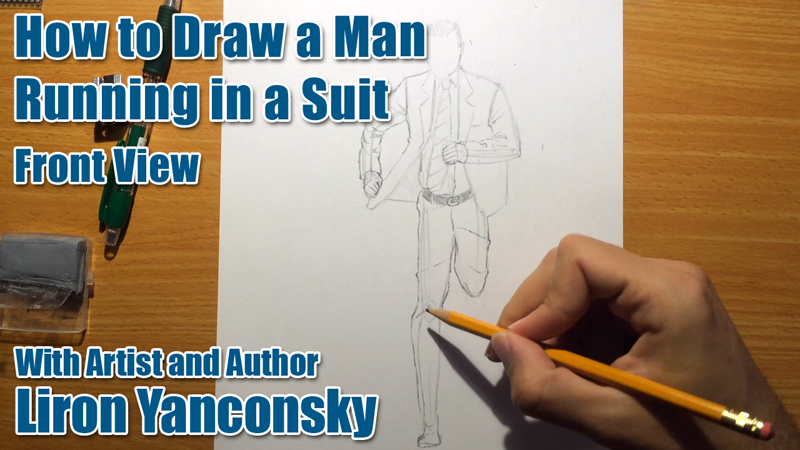
In this fun drawing lesson I’ll teach you how to draw a running man in a suit!
We’ll go over all steps from start to finish.
First watch the video. Then read on for more step-by-step details!
If you prefer a written article, here are some more drawing tips and details.
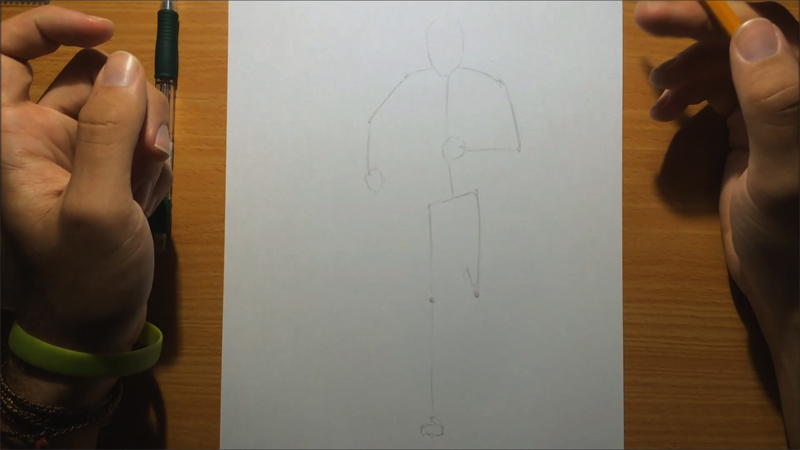
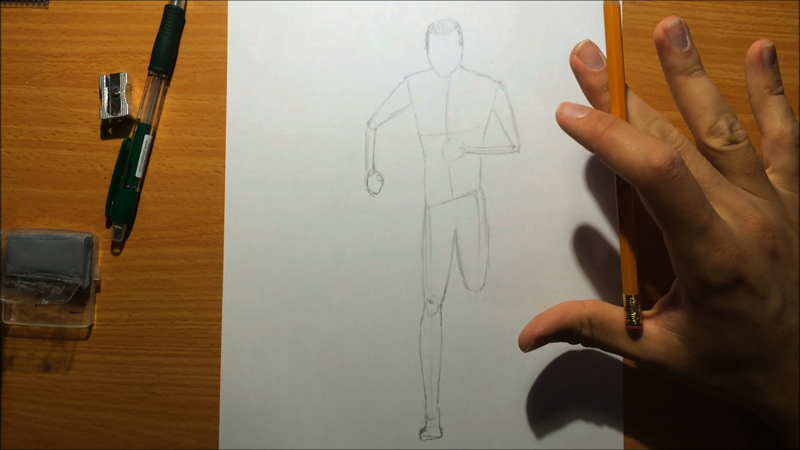
1. Draw the figure’s guidelines
In this step you create a simple skeleton composed of lines, that represents the figure in motion.
We are drawing a running man here, so it’s important getting this right.
I’ll note that I am not yet an expert in figure drawing, it’s something that takes a lot of time.
The key to this pose is to draw one hand being sent forward, and the opposite leg being sent forward as well. Here I drew the right hand moving forward, and the left leg sent forward as well.
Use reference to really get this down.
2. Turn it into a three-dimensional shape
In this step we want to turn our skeleton into a more three-dimensional body.
One way to do this is by turning all lines into cylinders and all joints into ovals.
In this specific drawing I didn’t go into too many details, because the entire figure will be covered in multiple layers of clothes.
In many cases however, you can’t get away with what I’ve done here (= You have to actually add in all details of the figure, such as the muscles.
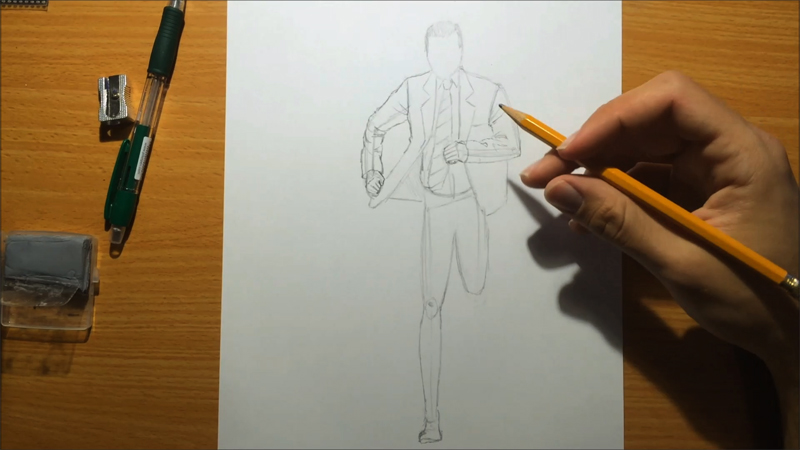
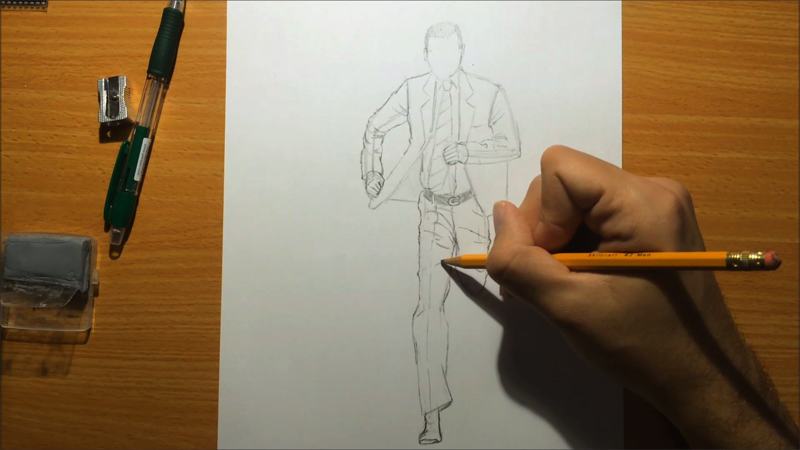
3. Drawing the clothes
In this stage we begin drawing the clothes.
The key here is to take into account the running movement, and understand how it affects the clothes.
Notice how I made the upper part of his suit “fly” in the air.
You’ll notice the same thing happen when I draw the pants.
And there you have it – a running man in a suit!
Thank you so much for reading / watching the video! Let me know if this helps you.

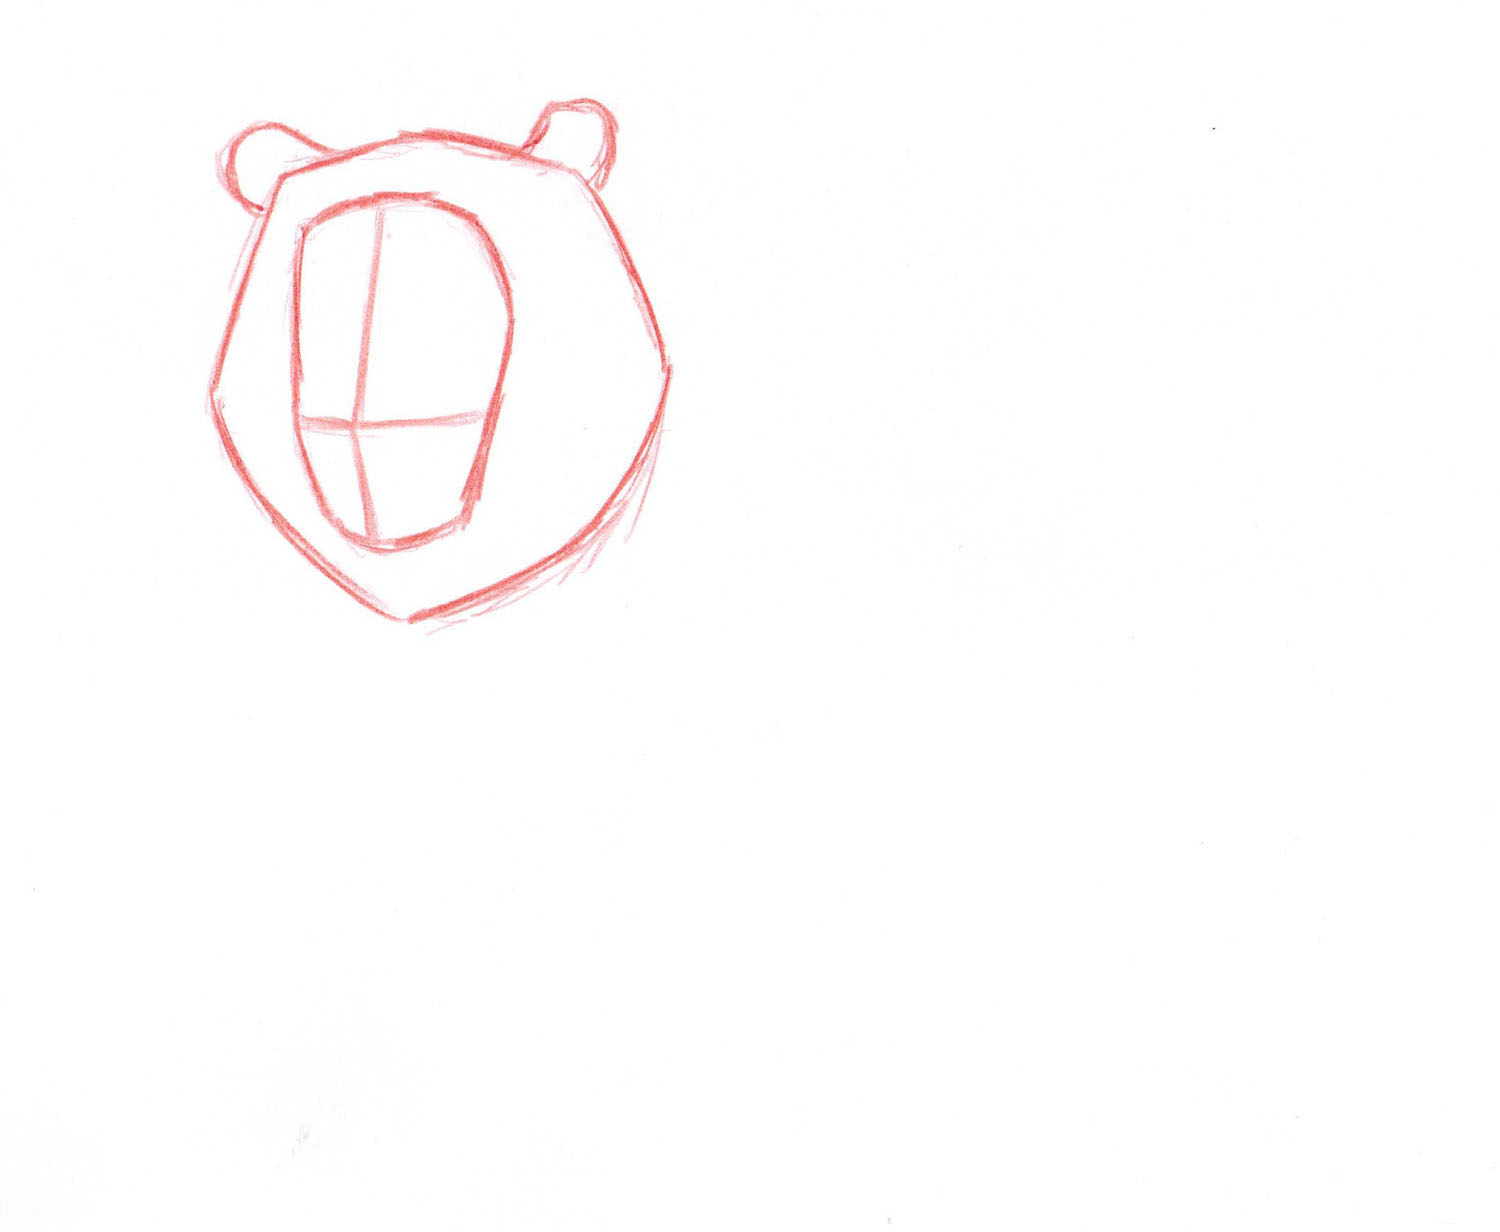 You can see I drew the head, together with two guide lines that will later tell us where the center of the lion’s face is.
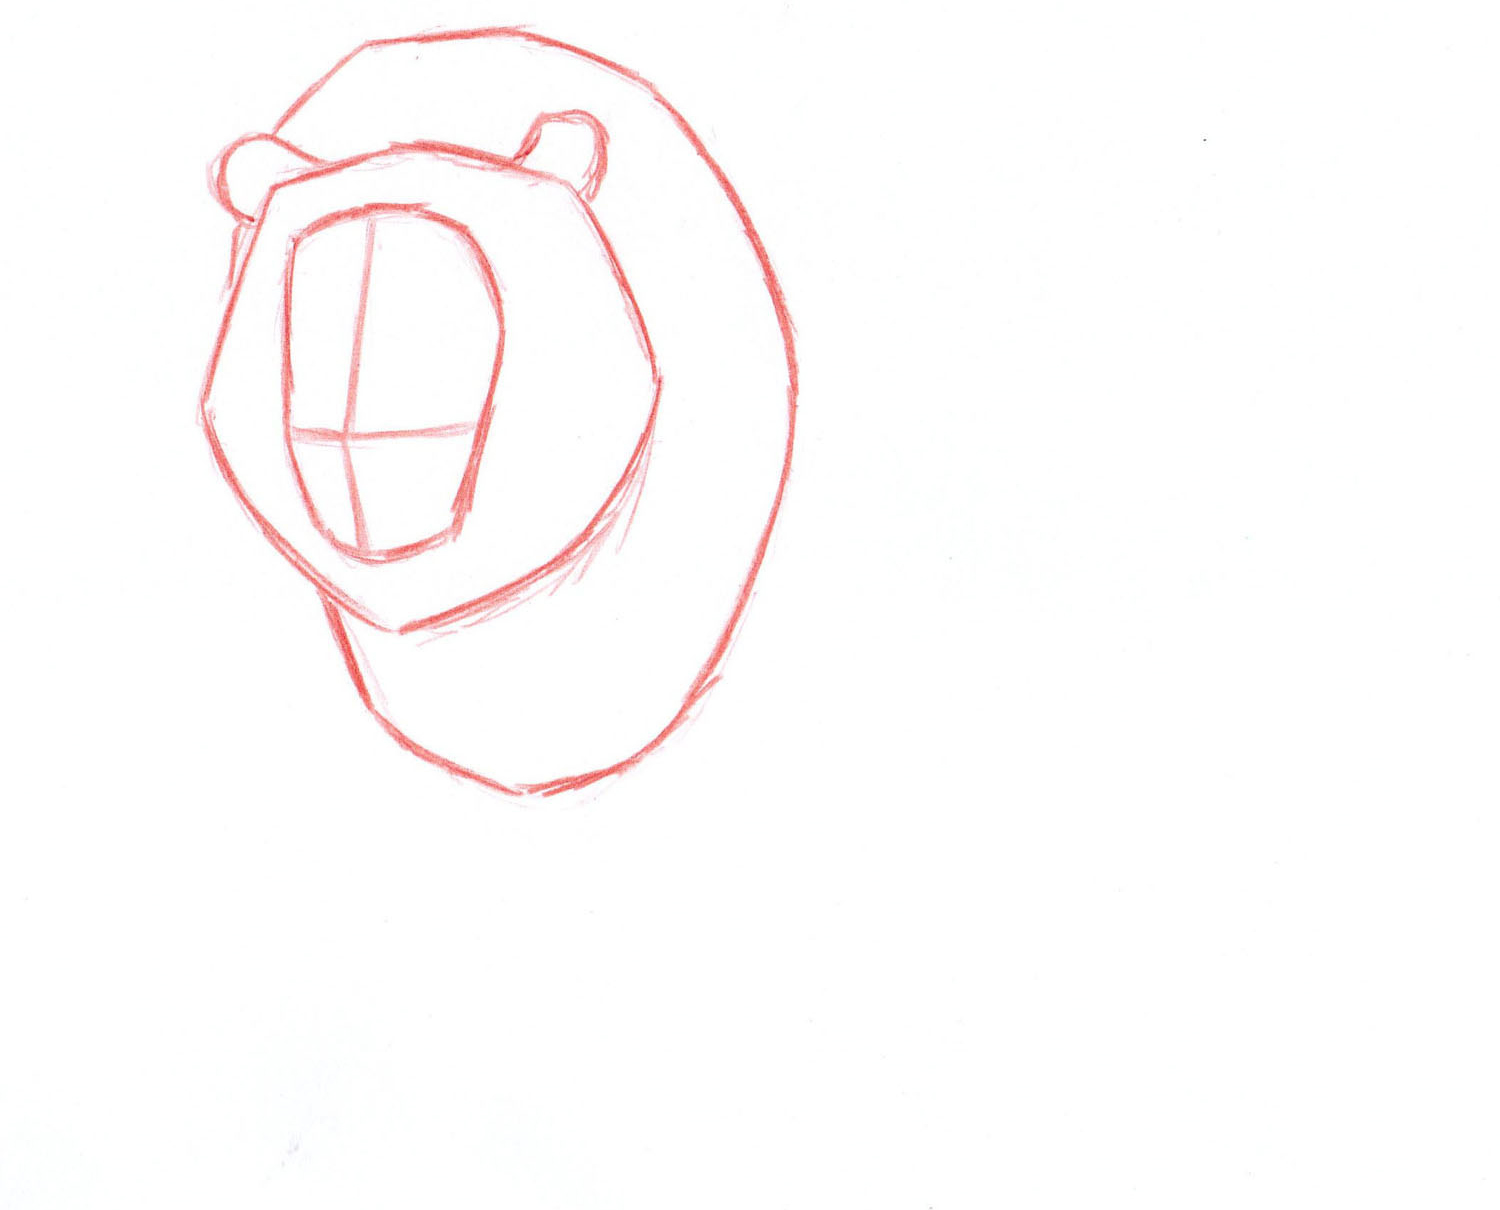 Here you can see I added a second mane. I notice after studying the way lions look, that they have what appears to be two manes. One is around their head, and the other one is bigger, usually darker, and reaches more to the back of their bodies.
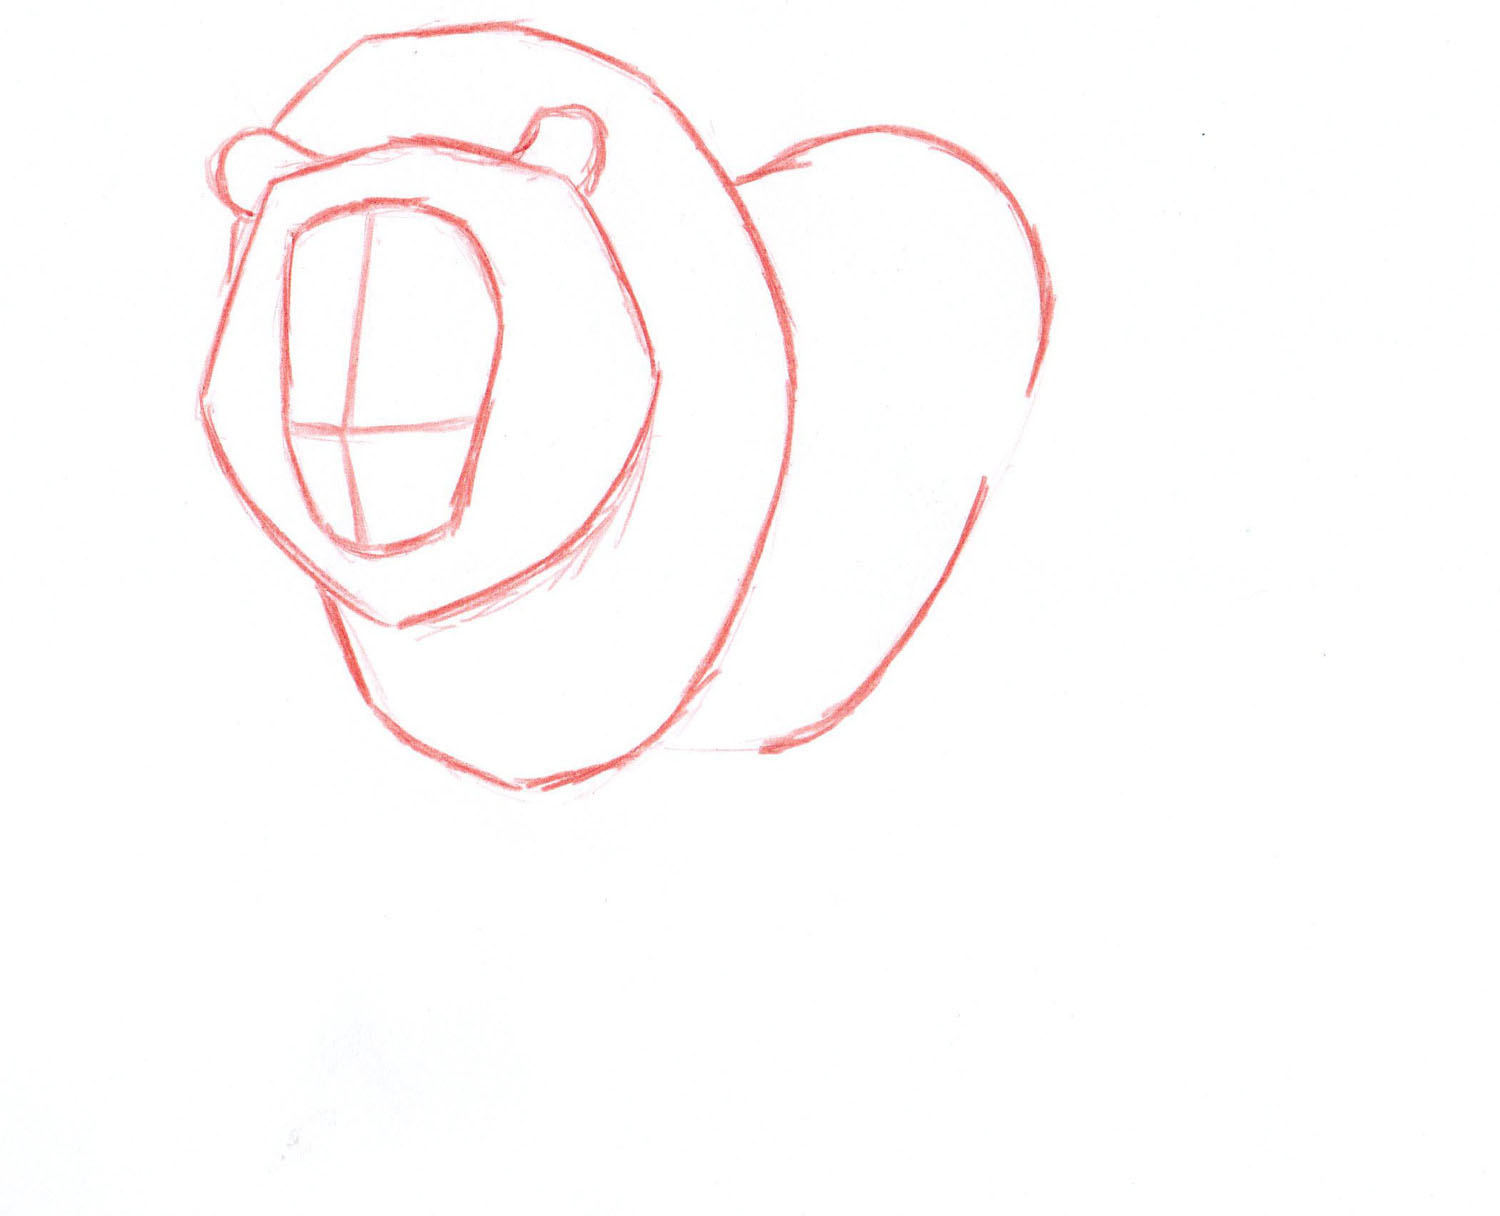 Here I added the body. Just like the head, it is turned to our left.
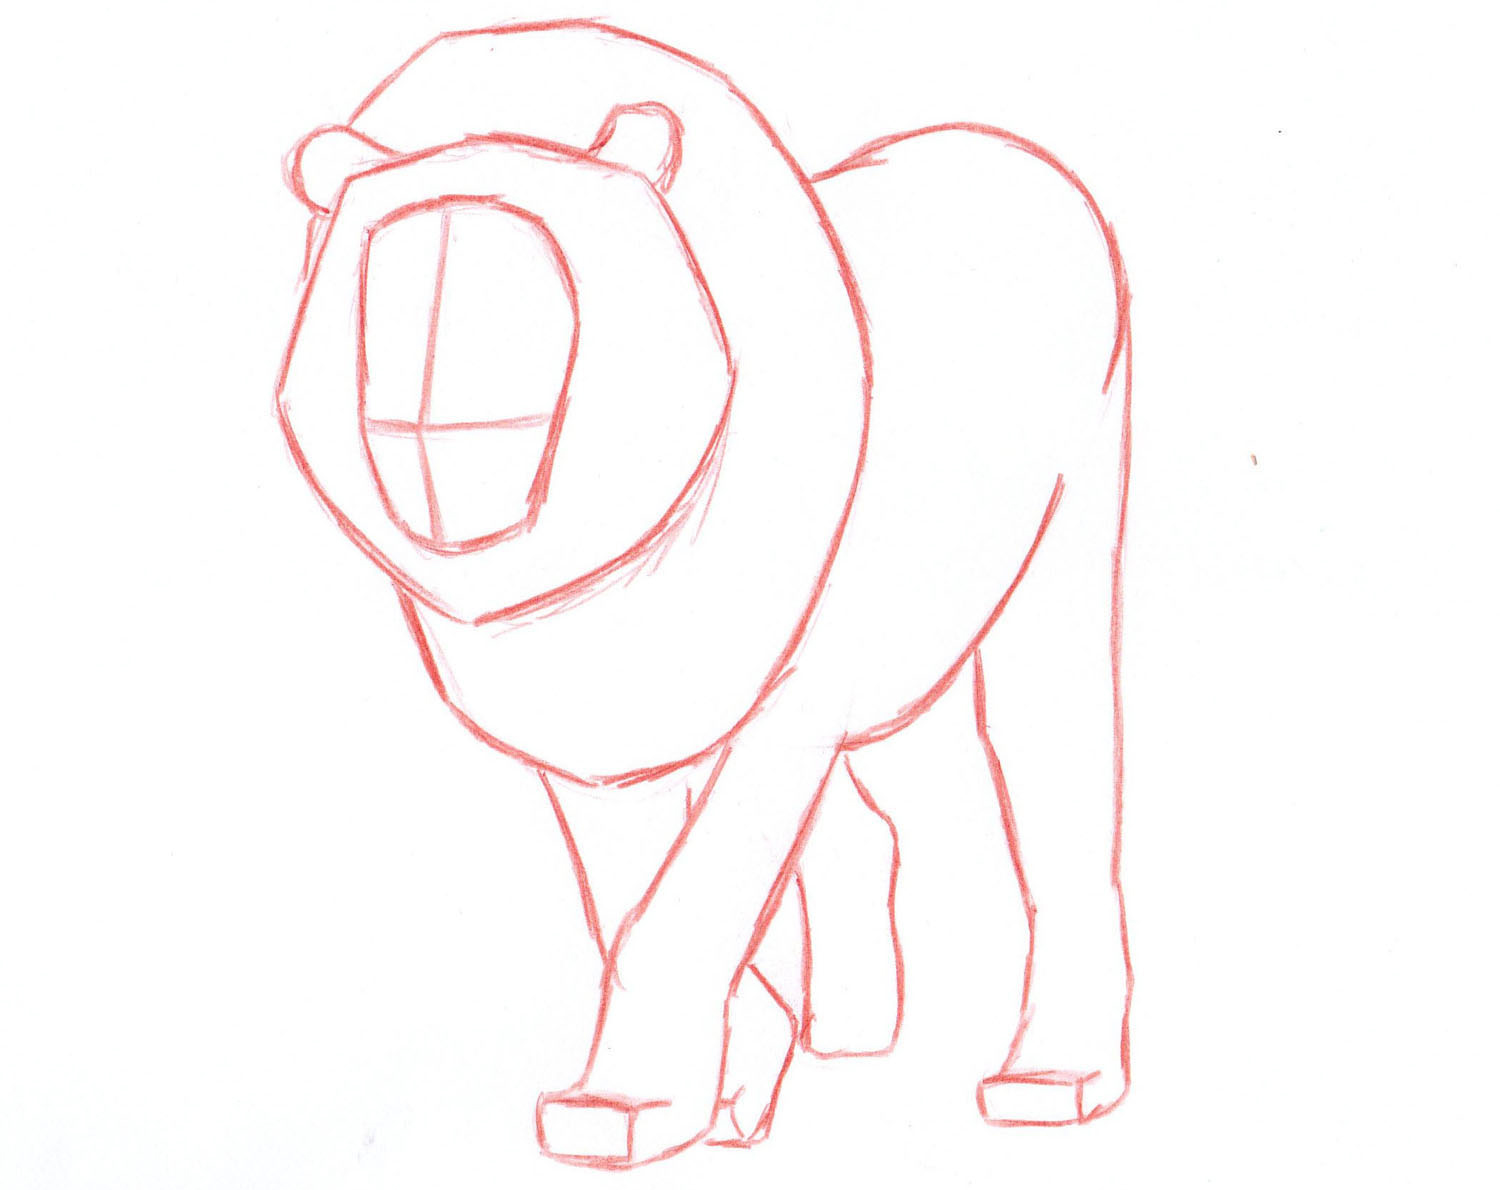 Here I added the legs, and lightly indicated the paws with square-ish forms, that will later be turned into rounder forms with the inking. This was the most challenging part for me, and it also challenges me in drawing the human body.
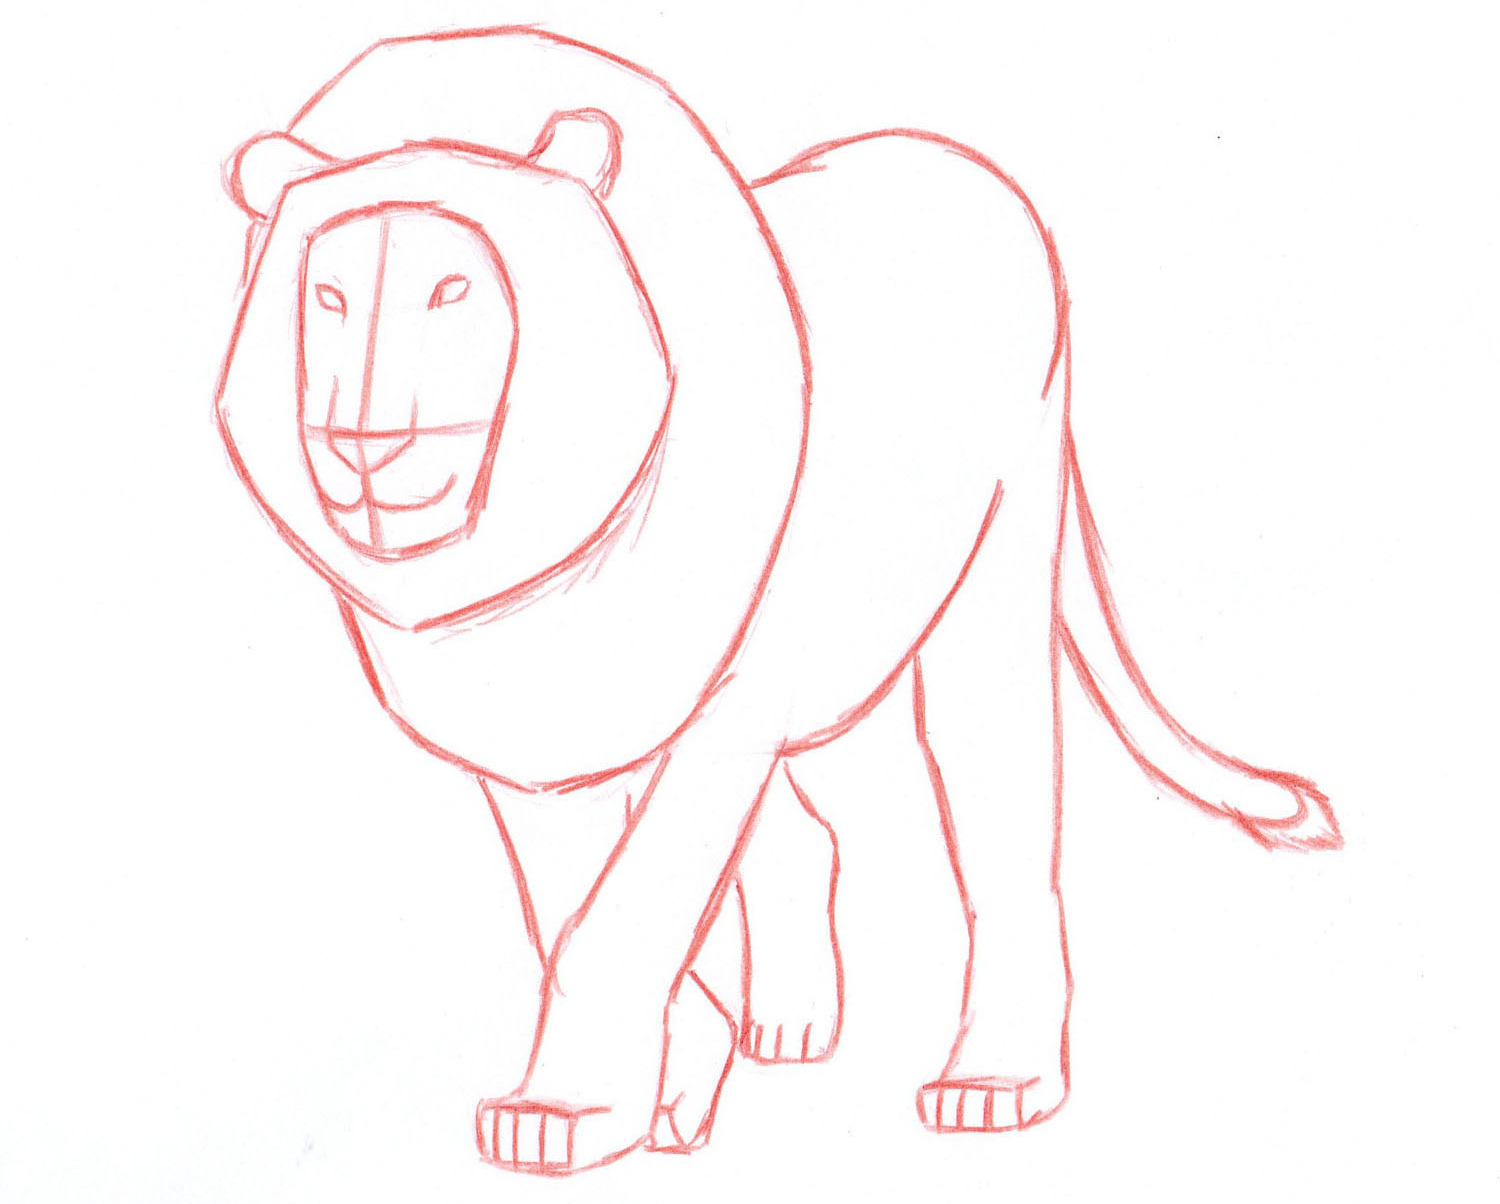 Here I added the details to the head and feet, as well as drawing a tail. This step, especially the face, will help us later on to ink this beast in a cool and correct manner.
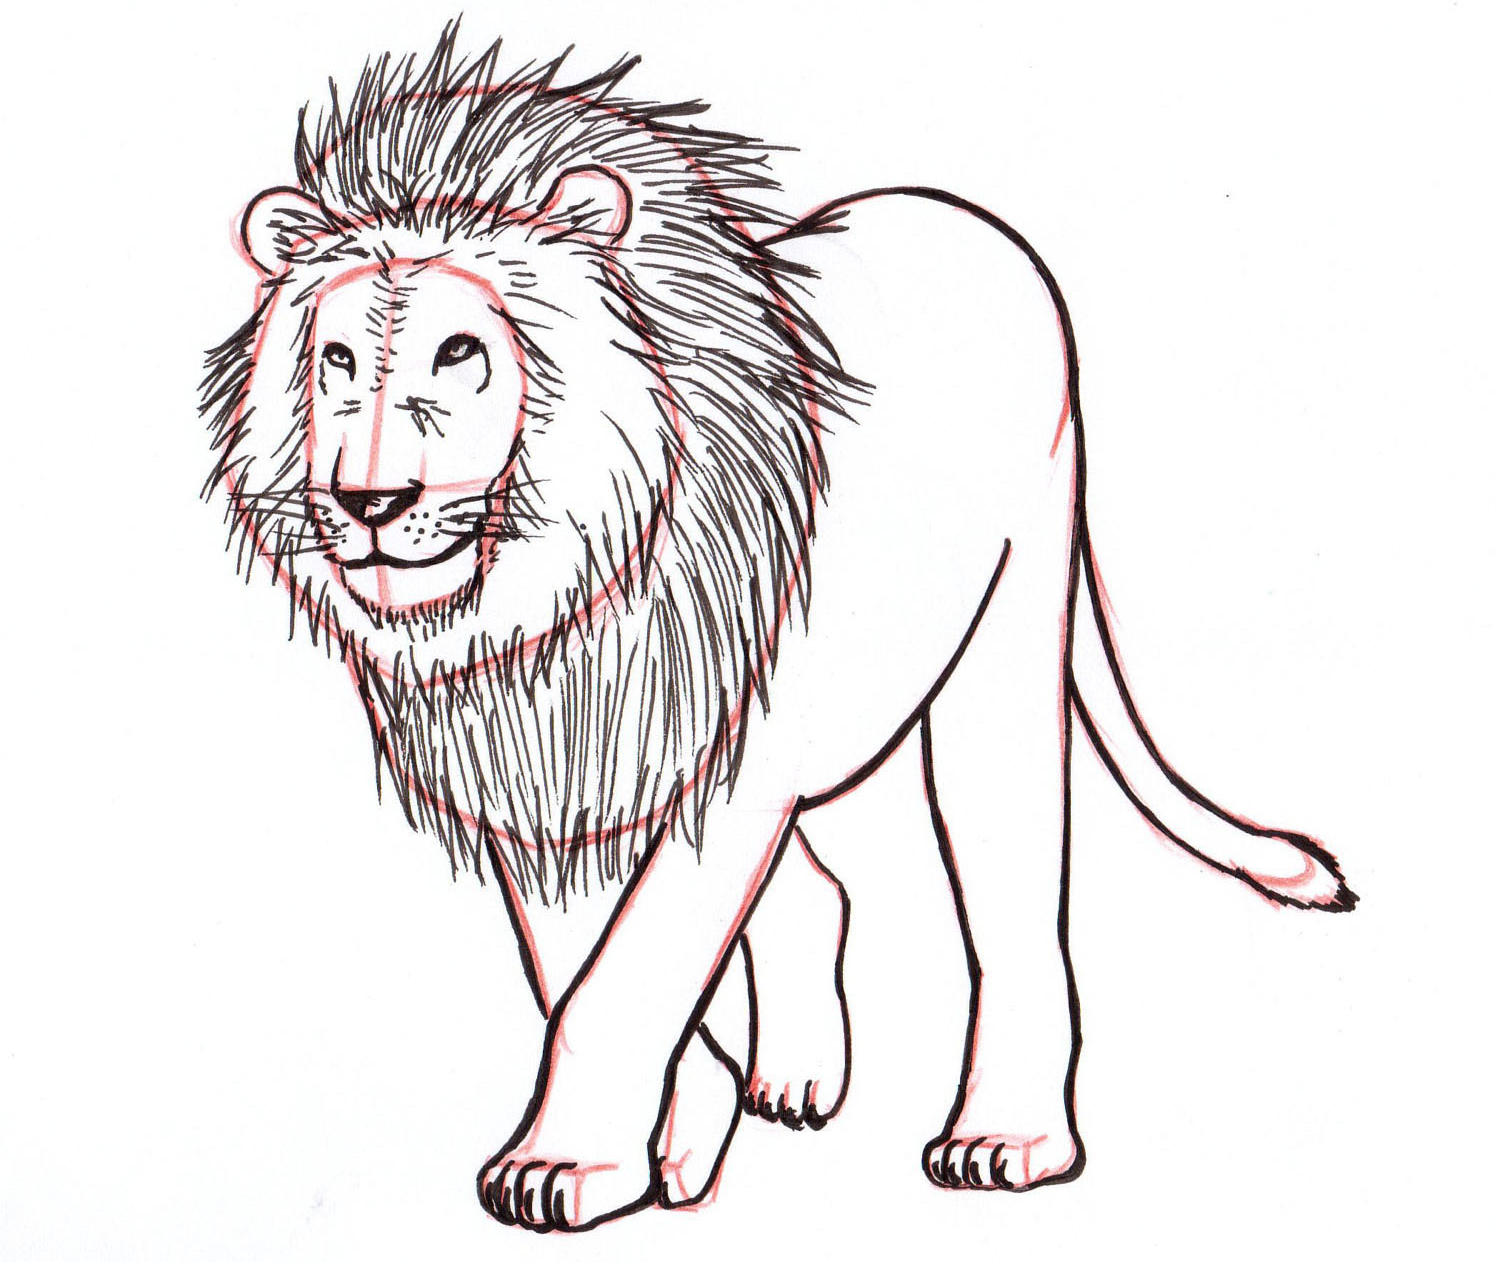 This is the inked lion. The body didn’t change much, but look at the face, manes and paws.
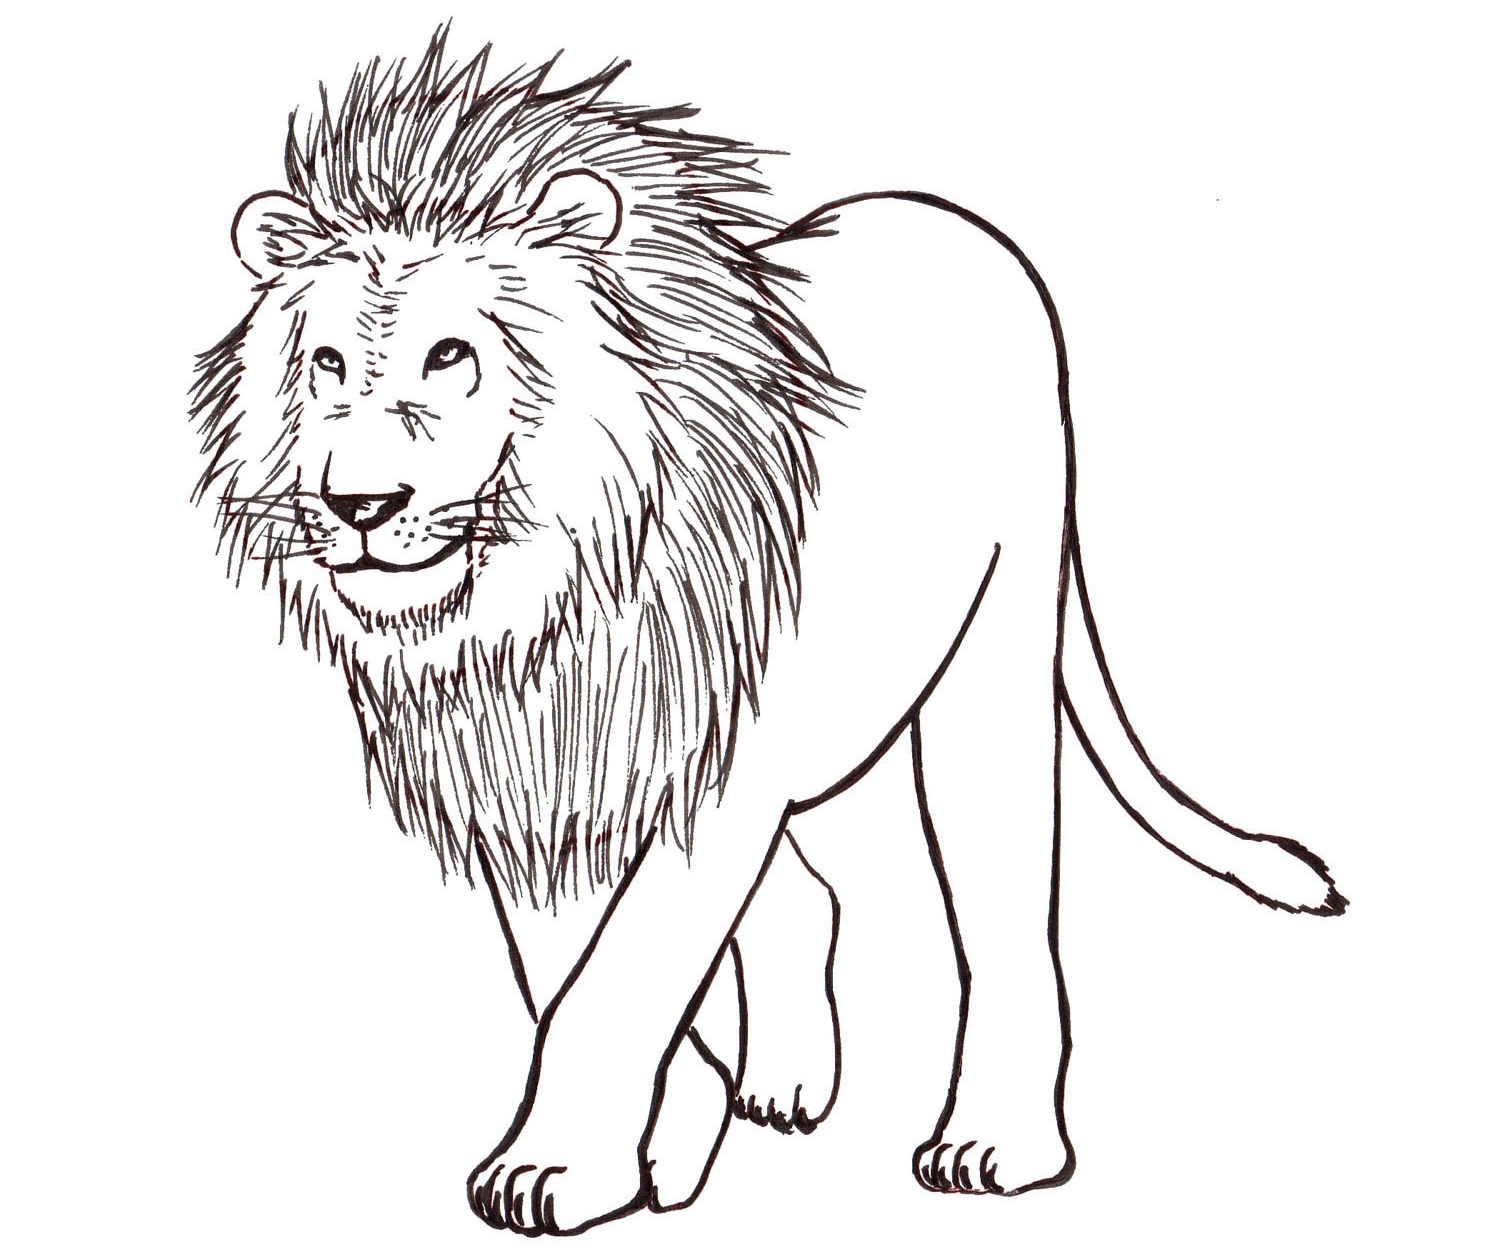 Voila!