How to Draw Link From The Legend of Zelda (Oracle of Ages version)

Hey friends!

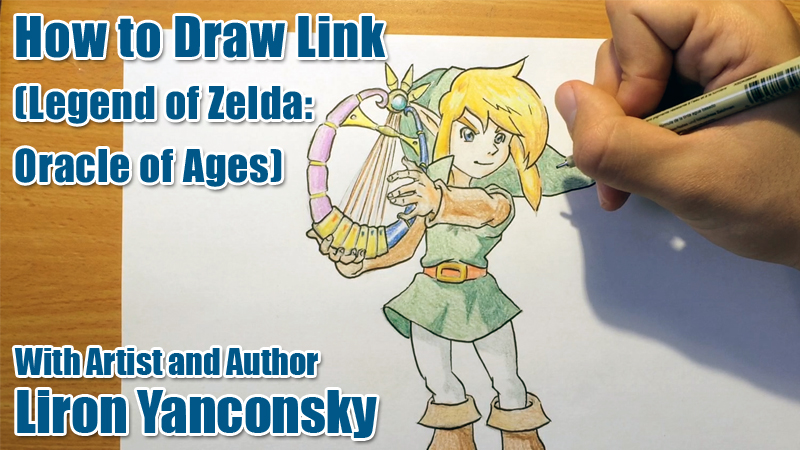
In this drawing lesson I’ll teach you how to draw Link from The Legend of Zelda. As an added bonus, we are going to draw Link in his Oracle of Ages version! (=

I’ll be using this image for reference.

So let’s get started!

Video

Check out the video of part 1. When you are done, either move on to part 2 and 3, or read on for an entire breakdown of the steps for the three videos.

Guidelines

Our guidelines here are very simple.
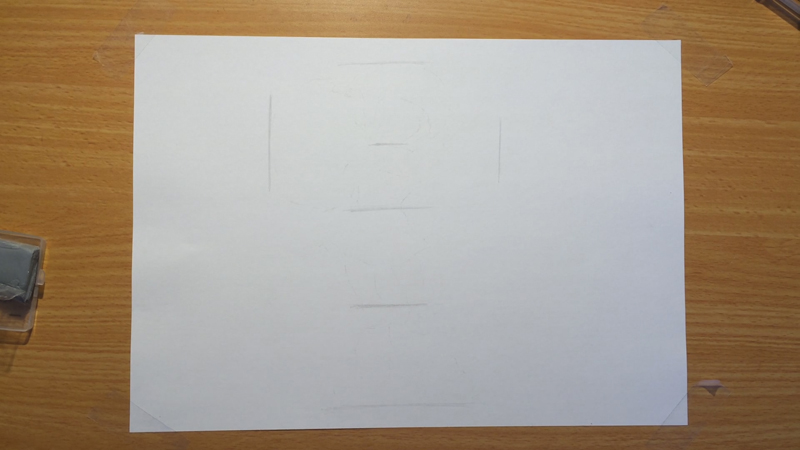
How to draw link 1

From top to bottom, I divided the area into two “halves”.

The reason why I use quotation marks is that there is a 40-60 relation. The top “half” takes up 40%, while the bottom takes up 60%.

Then, I divided each of these halves into real halves.

I also added two lines at the sides, representing the borders of the drawing.

Next, let’s start drawing Link’s head.
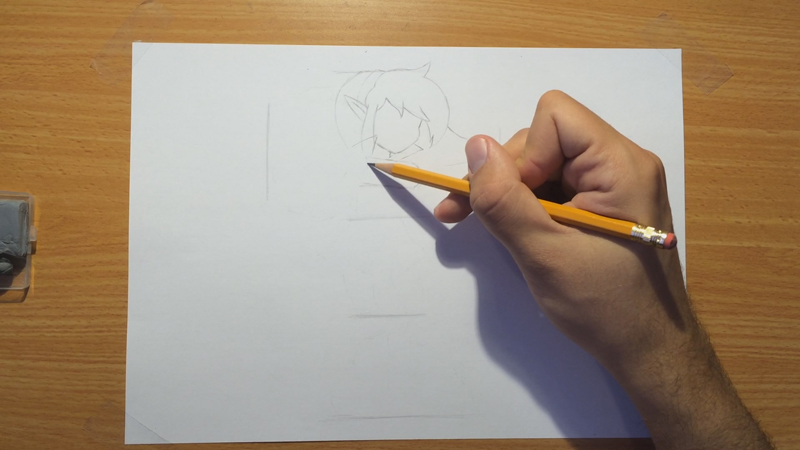
How to draw link

The head takes up the top most quarter.

His head is looking to our right side, and so there is a slight tilt. It’ll become more noticeable when we add the face itself.

Notice how his hood / cape is flying to the right.

Now let’s add his left hand, which is playing the harp of ages (=
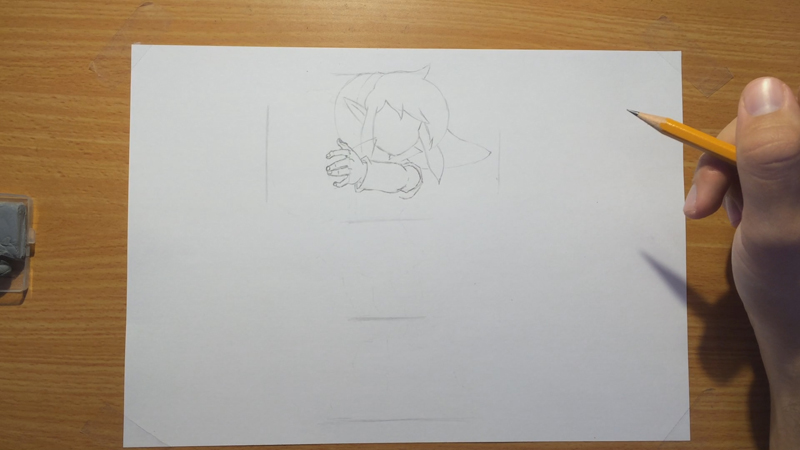
How to draw link

The fingers here can be a real challenge. I notice how in this poses, it seems like the middle and ring fingers are closer together than the rest of the fingers.

Also notice how the fingers are rounded.

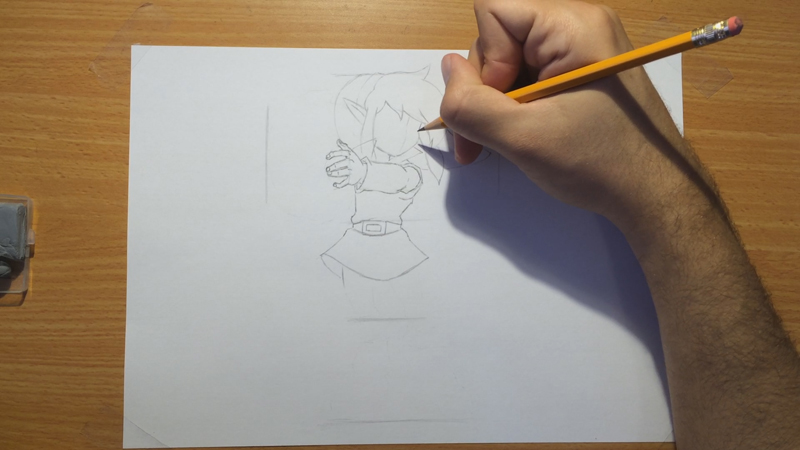
Next, let’s start indicating the upper part of the body.
How to draw link

The important thing here is to understand how his belt is pressing down his clothes.

This creates these small bulges around Link’s waist.

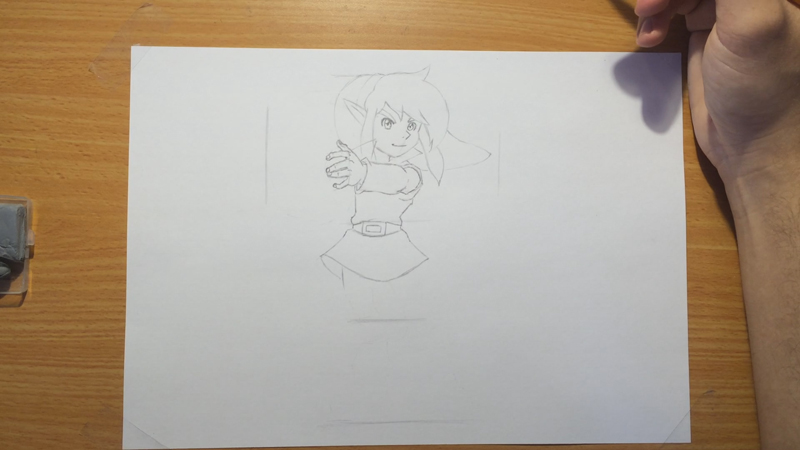
Next, we’ll draw Link’s face.
How to draw link

There are two main things to remember here.

#1 – Link’s head is rotated to our right.

This makes his nose point to the right. It also means his left eye (right eye from our side) will appear to be a little smaller, because it’s “moving away” from us.

#2 – Keep things light.

With faces, especially in the manga and Japanese-styled art, you really want to keep things simple.

Drawing too many details, or drawing lines that are two strong, will lead to bad results. You want to draw this part very gently.

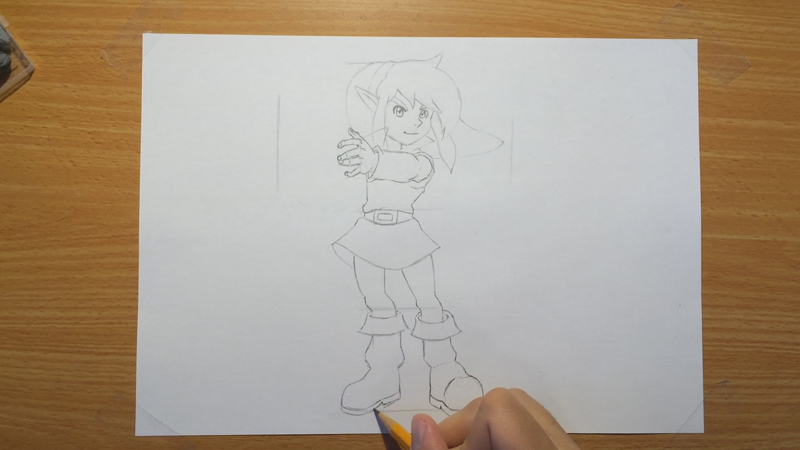
Now, let’s add the legs and boots.
How to draw link

I found the legs to be challenging, but I used reference for the entire drawing so that made things simpler.

Make sure to get the knees pointing in the right directions. Notice how I drew the left knee pointing left, and the right knee pointing right.

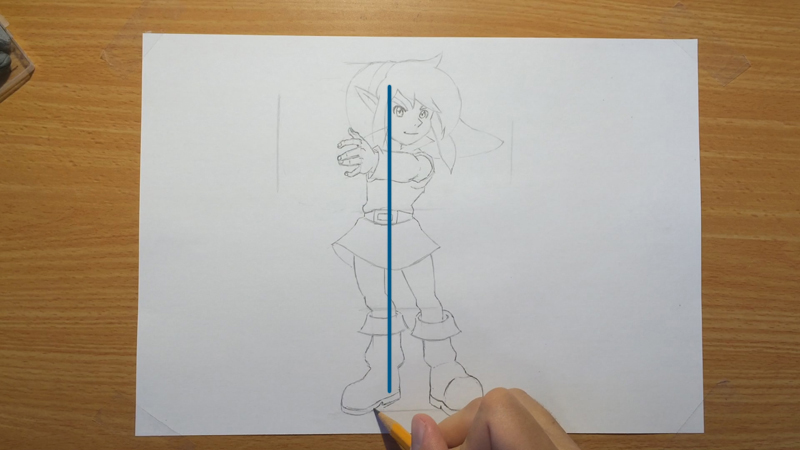
Also, notice how most of his weight is supported by his left (our right) leg.

You can see that this is his center of weight, because you can actually draw an entire straight line all along his left foot, and throughout his entire body.

Here is an illustration of this.
How to draw link

Also, notice how his boots are unproportionally huge, so get that in as well =P

Next, we’ll draw the harp.

Now, because it is highly detailed, we want to first indicate it using simple lines. It’s main shape is a circle.

Let’s get that in:
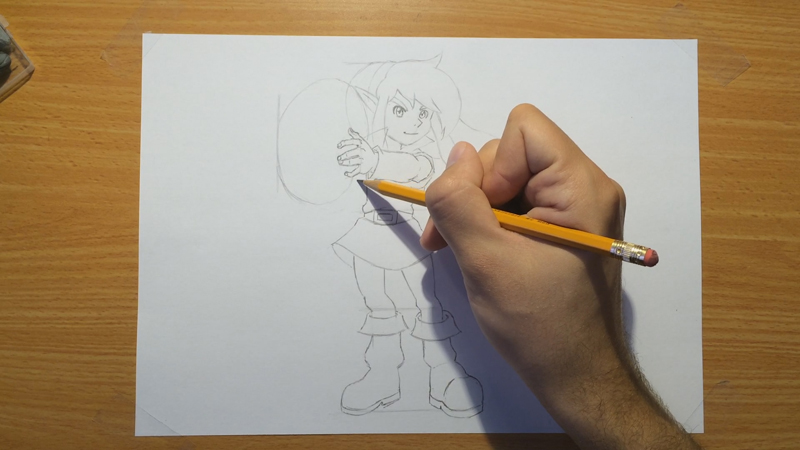
How to draw link

Now that we have the basic shape, let’s add the details according to the reference.
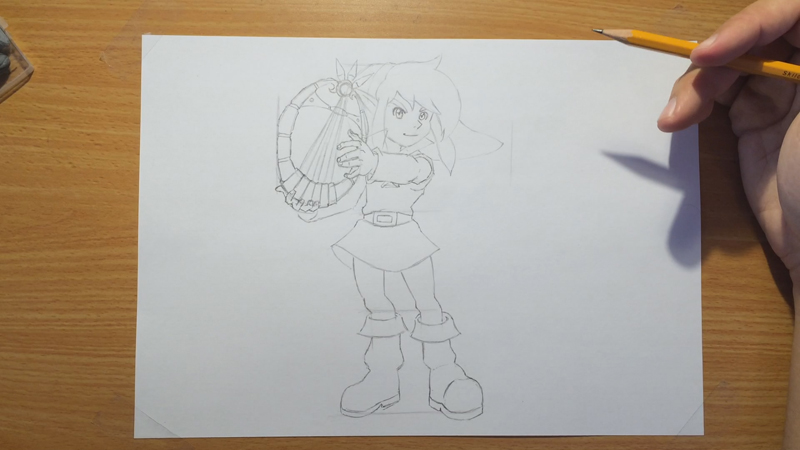
How to draw link

Here we go!

Now all that’s left to do is color and ink.

I tend to first color, and only then ink. I learned that trick from Mark Crilley.

So I begin by applying a first layer for each color I’ll be using. I am using colored pencils for this example, as I want to keep it simple.

Here is the first layer for Link’s Tunic’s green.
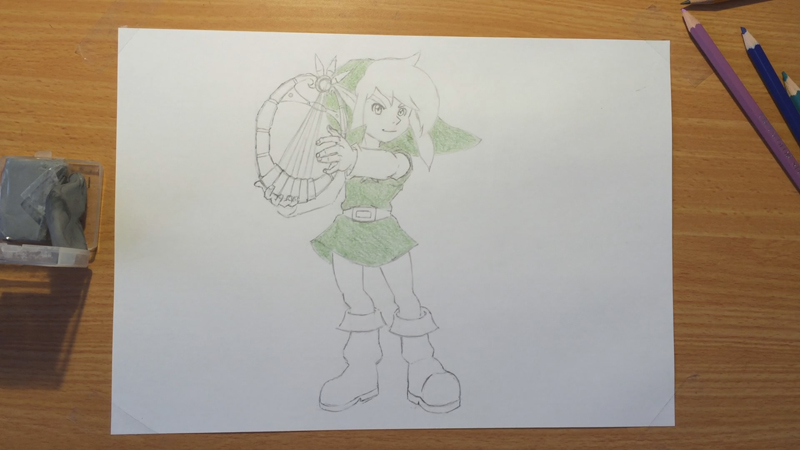
How to draw link

Noting too fancy here. I simply colored ALL that is green!

Next, I draw a first layer for the rest of the colors in this drawing.
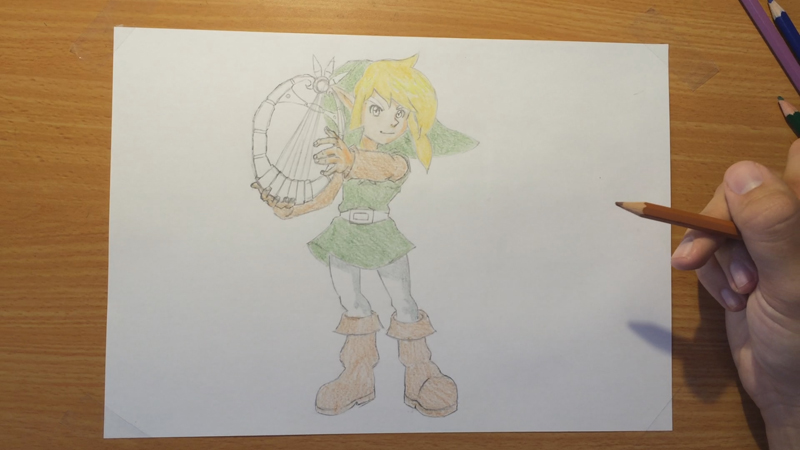
How to draw link

Now it’s time to add the second layer, that will be darker, and will create the shades.

In order to do that, we need to set up the light source, and understand where we need to shade.

I jumped the gun earlier by shading the right sides of his legs, so we will go with that direction.

Let’s go ahead and color that second layer.
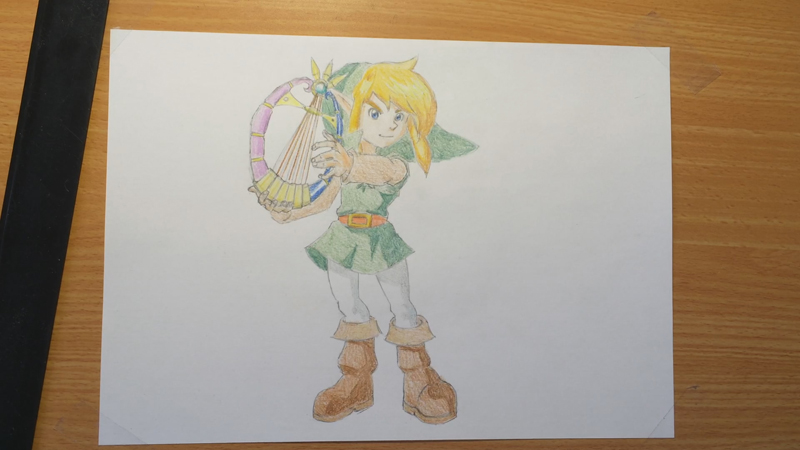
How to draw link

There we go! What do you think?

Notice how that second layer made the drawing POP, especially the highlights of the hair.

Also take a closer look at the harp. I left a part of the blue section entirely white. This creates a nice shiny effect.

Now we can finally ink Link!

I’ll start working from left to right, making sure I don’t smear my own lines.

I’m drawing the lines as quickly as possible. Takes some skills – practice makes perfect!
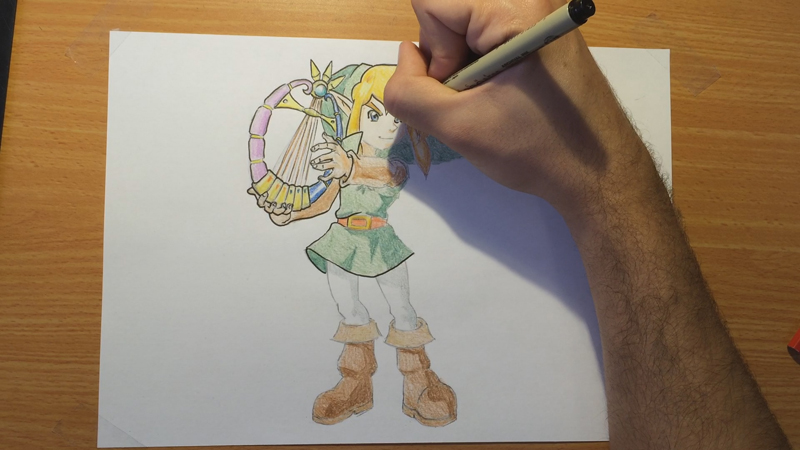
How to draw link

Because I colored first, I don’t even have to go over ALL lines. I can pick the important ones.

Also, I make sure I use different widths of lines, in order to get an interesting look. Some lines I make thick, others very thin and simple (especially around the face!).
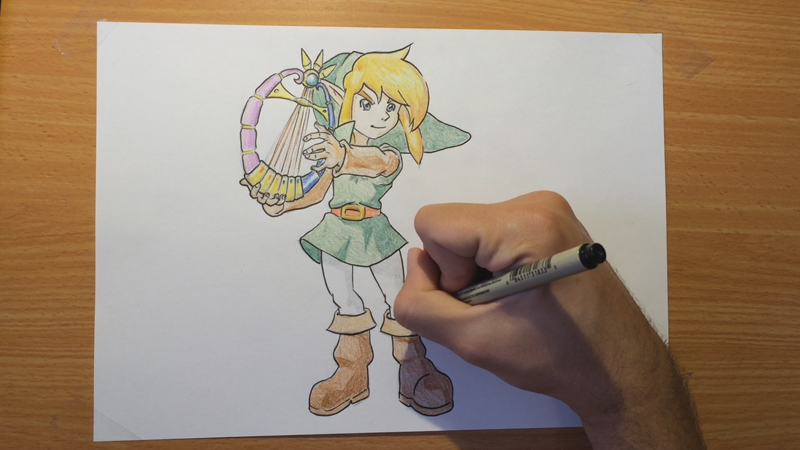
How to draw link

And we are done!

I’ll probably create more video tutorials and articles on additional characters from The Legend of Zelda, and specifically Oracle of Ages (I LOVED that game).

Thank you so much for reading. Feel free to leave a comment or a question below, and I’ll answer everything!

Also, don’t forget to SUBSCRIBE to my blog (ON THE LEFT), or via my Get Awesome Stuff page!

You’ll get my eBook for free + great tips and advice on drawing, delivered straight to you! (=

Truly yours,

– Liron

How to Draw a Running Man in a Suit

Hey friends!

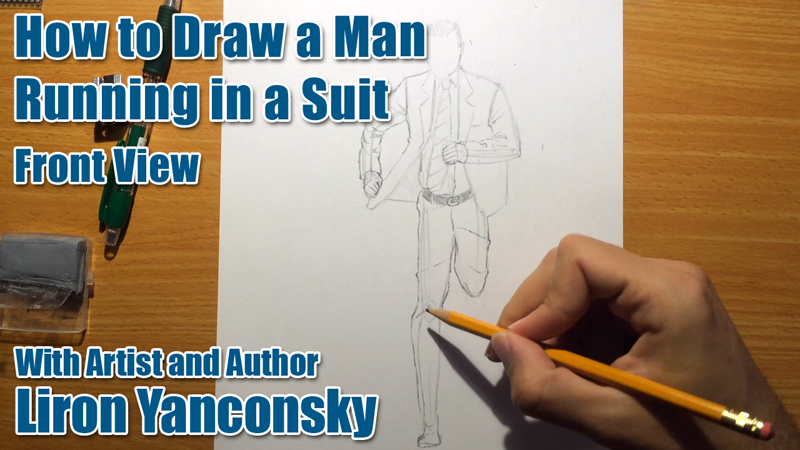
In this fun drawing lesson I’ll teach you how to draw a running man in a suit!

We’ll go over all steps from start to finish.

First watch the video. Then read on for more step-by-step details!

If you prefer a written article, here are some more drawing tips and details.

1. Draw the figure’s guidelines

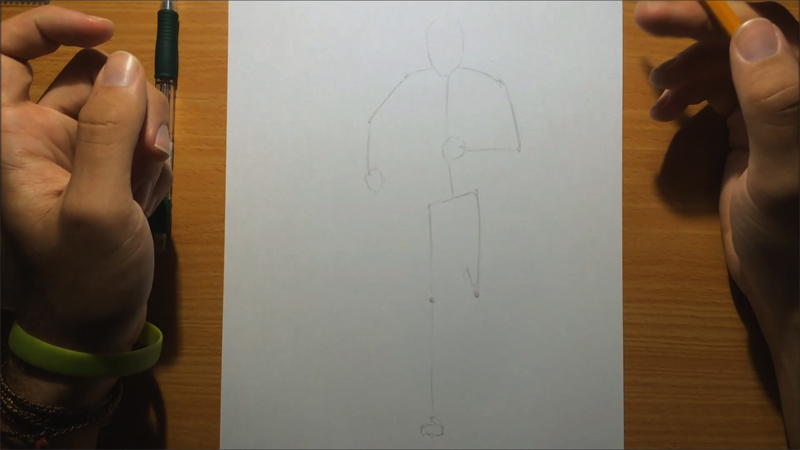
In this step you create a simple skeleton composed of lines, that represents the figure in motion.

how to draw a running man

We are drawing a running man here, so it’s important getting this right.

I’ll note that I am not yet an expert in figure drawing, it’s something that takes a lot of time.

The key to this pose is to draw one hand being sent forward, and the opposite leg being sent forward as well. Here I drew the right hand moving forward, and the left leg sent forward as well.

Use reference to really get this down.

2. Turn it into a three-dimensional shape

In this step we want to turn our skeleton into a more three-dimensional body.

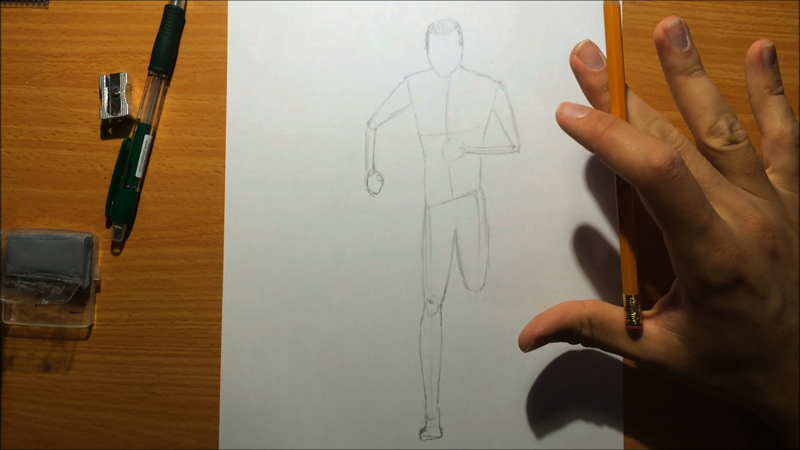
One way to do this is by turning all lines into cylinders and all joints into ovals.

how to draw a running man

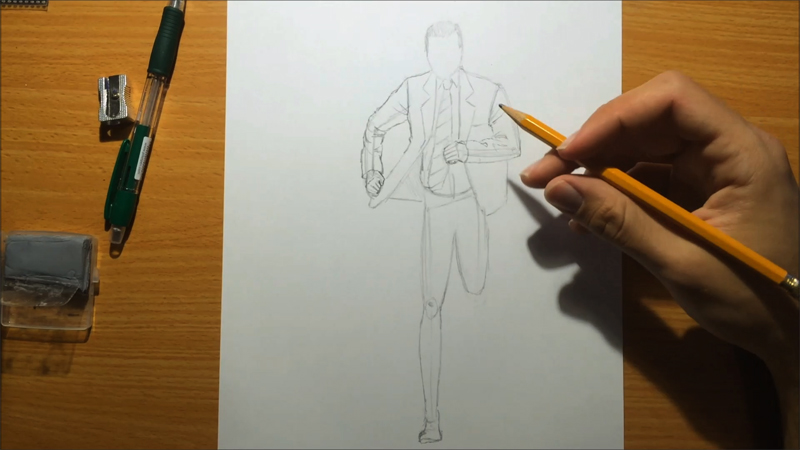
In this specific drawing I didn’t go into too many details, because the entire figure will be covered in multiple layers of clothes.

In many cases however, you can’t get away with what I’ve done here (= You have to actually add in all details of the figure, such as the muscles.

3. Drawing the clothes

In this stage we begin drawing the clothes.

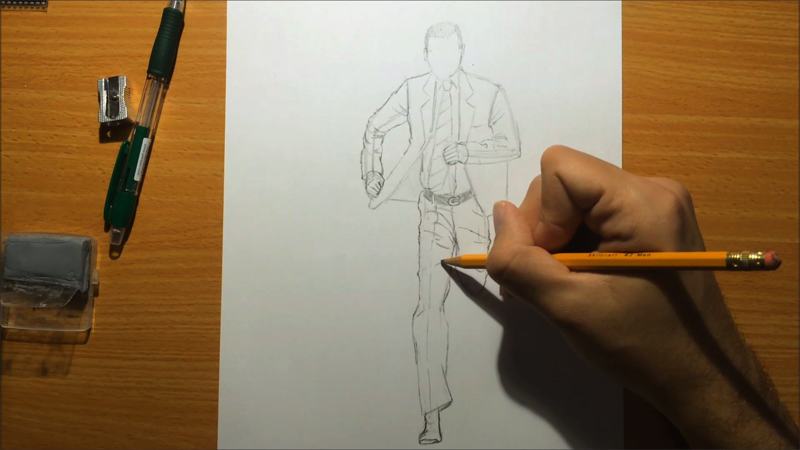
The key here is to take into account the running movement, and understand how it affects the clothes.

how to draw a running man

Notice how I made the upper part of his suit “fly” in the air.

You’ll notice the same thing happen when I draw the pants.

how to draw a running man

And there you have it – a running man in a suit!

Thank you so much for reading / watching the video! Let me know if this helps you.

Don’t forget to SUBSCRIBE to my blog (ON THE LEFT), or via my Get Awesome Stuff page!

You’ll get my eBook for free + great tips and advice on drawing, delivered straight to you! (=

And I’ll see you soon,

– Liron

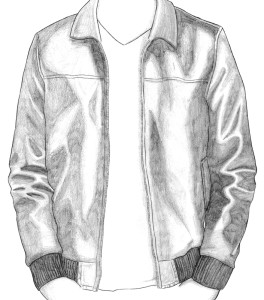
How to Draw a Leather Jacket

Hey friends!

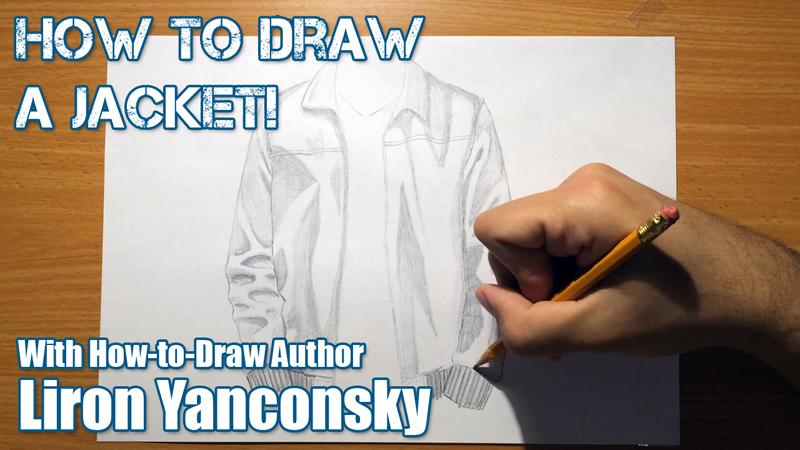
In this lesson I’ll teach you how to draw a leather jacket.

Well, I’m vegan, so let’s say this is a synthetic leather jacket, shall we? (=

Anyway – check out the vid, and I’ll wrap up with some key tips!

Okay, hope you enjoyed this one!

Here are a few key tips for drawing jackets.

Learn How to Draw Folds and Clothes

This is rather obvious. You must understand folds in clothes, and learn how to draw them.

For a good beginner’s guide, check out my book on drawing folds and clothes on Amazon.

4 Cover Nov 2 copy - DS

Leather / synthetic Leather

What characterizes clothing items made of leather or synthetic leather is that they are mostly THICK and DURABLE.

This cause LESS folds to appear. It also causes them to become thicker and larger.

This can very from one jacket to another, but it can be used as a general rule.

Also, this material is usually shiny. This means we’ll leave many areas entirely white in our drawings.

And that’s really all there is to it. Follow these guidelines while using reference, and I’m sure you’ll get this down.

Here is the final version of this drawing:

how to draw a leather jacket

Let me know if you have any questions.

And as always, be sure to SUBSCRIBE to my blog (ON THE LEFT), or via my Get Awesome Stuff page!

You’ll get my eBook for free + great tips and advice on drawing, delivered straight to you! (=

I’ll talk to you soon,

– Liron

How to Draw a 3D Cube!

Hey friends!

In this drawing lesson I’ll teach you a high demanded topic – how to draw a 3d cube!

Now, there are a lot of different videos / lessons on drawing a cube.

But…

I want to put an emphasis on UNDERSTANDING how a cube looks from all angles, which will allow you to draw it in ANY angle you would like.

Sounds awesome? That’s because it is.

First – watch the vid. Than, read on for the key tips.

Okay, got it?! Now for the main points:

What is a Cube?

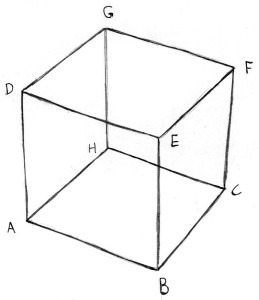
A cube is a three-dimensional object that has 6 equally sized sides. It also has 8 pointy angles.

Here is a transparent cube depicting this.

How to draw a 3d cube

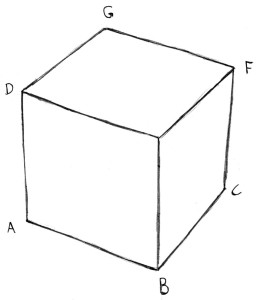
In reality, we can only see up to  3 planes of the cube.

Here is how it looks.

How to draw a 3d cube

Different Angles

If we move the cube around, we will see less of certain sides and more of others.

This happens because when we look at things from an angle, they become squeezed. That’s called foreshortening, and will be covered in a separate post (=

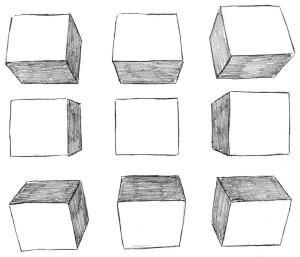
Anyway, here are some cubes at different angles.

How to draw a 3d cube

Notice how the in the center most cube – we can only see ONE side.

The ones above it are tilted upwards or downwards, and allow us to see TWO sides.

The rest are tilted both upwards / downwards, AND  sideways. This allows use to see THREE sides.

That’s how it works (=

Hopefully now you can draw a 3D cube at ANY angle you wish!

Hit me up with questions, or anything else you might have in mind, and I’ll do my best to help!

Also, be sure to SUBSCRIBE to my blog (ON THE LEFT), or via my Get Awesome Stuff page!

You’ll get my eBook for free + great tips and advice on drawing, delivered straight to you! (=

Until next time,

– Liron

How to Draw a 3D Ball

Hey friends!

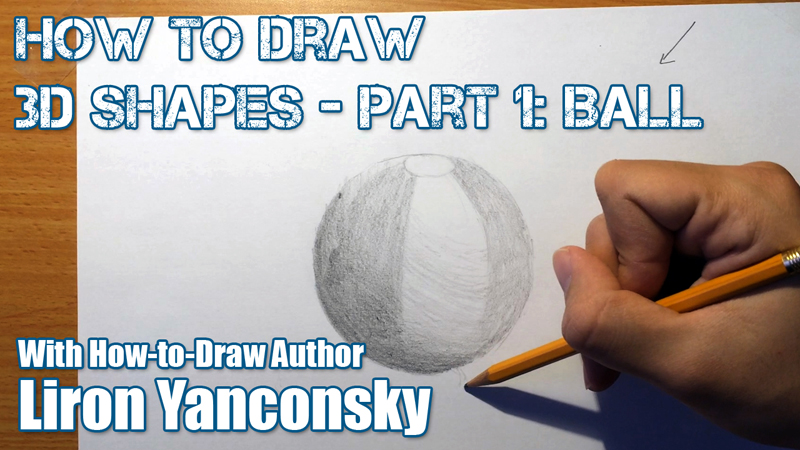
In this drawing lesson I’ll teach you how to draw a 3D ball! Well actually it’s a beach ball… Let’s go!

Check out the video first, and then read on for extra drawing tips.

Key tips:

1. Draw an accurate shape

Shading is important, but remember that drawing an accurate shape to begin with is ALSO important.

Try and get the guidelines to be relatively accurate, and in place.

2. Set the light source – and stick to it!

This may be basic to some, but is important to take note of. Upon deciding on a light source, make sure you stay “loyal” to it.

If light comes from the right side, make sure all left / inner / indented parts are darker.

3. How to draw the shadows themselves

There are several factors that dictate how shadows look.

The key ones are:

  • Distance / direction of the light source
  • Strength of the light source
  • Distance of object from the surface on which the shadow falls

Here are a few simple examples:

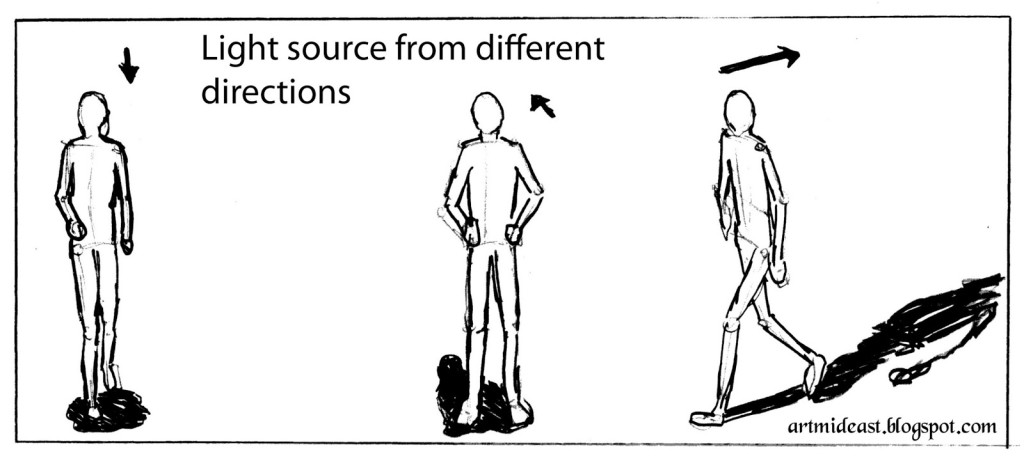
Direction of the light source:

Direction

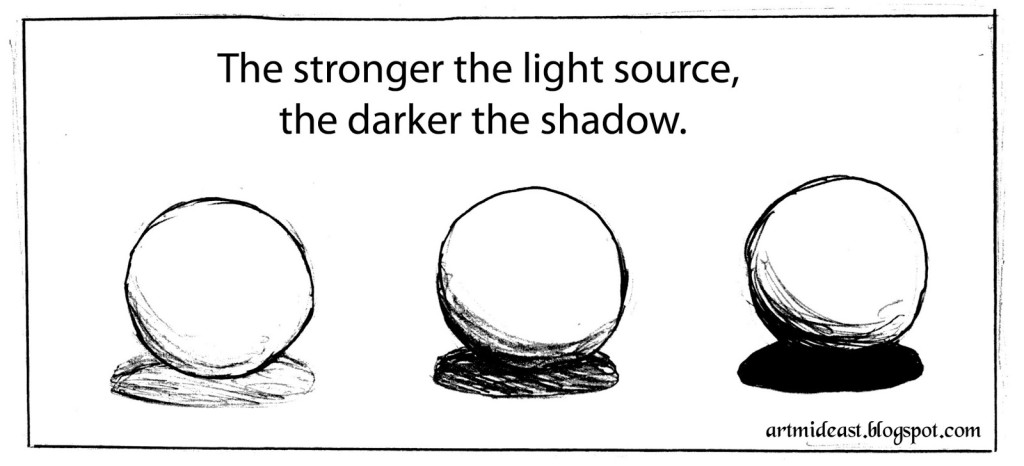
The stronger the light source, the darker the shadow:

Strength

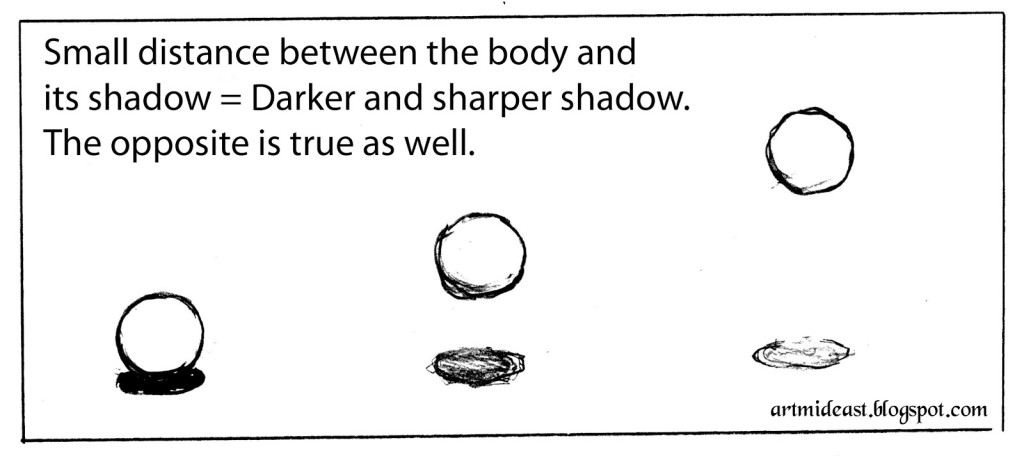
The SMALLER the distance between the object and it’s cast shadow, the DARKER the cast shadow becomes.

Distance

Aaaaand that’s probably it for this drawing lesson! Hope you learned something new.

Also, be sure to SUBSCRIBE to my blog (ON THE LEFT), or via my Get Awesome Stuff page! You’ll get my eBook for free + great tips and advice on drawing! (=

I’ll talk to you soon,

– Liron