
Hey friends!
In this drawing lesson I teach you how to draw a shirt, step-by-step.
I put an emphasis on the folds and clothes that are created in the shirt.
Key points on how to draw a shirt:
1. Learn where folds are created in shirts.
Here is an infographic showing the main locations of folds, with some examples:
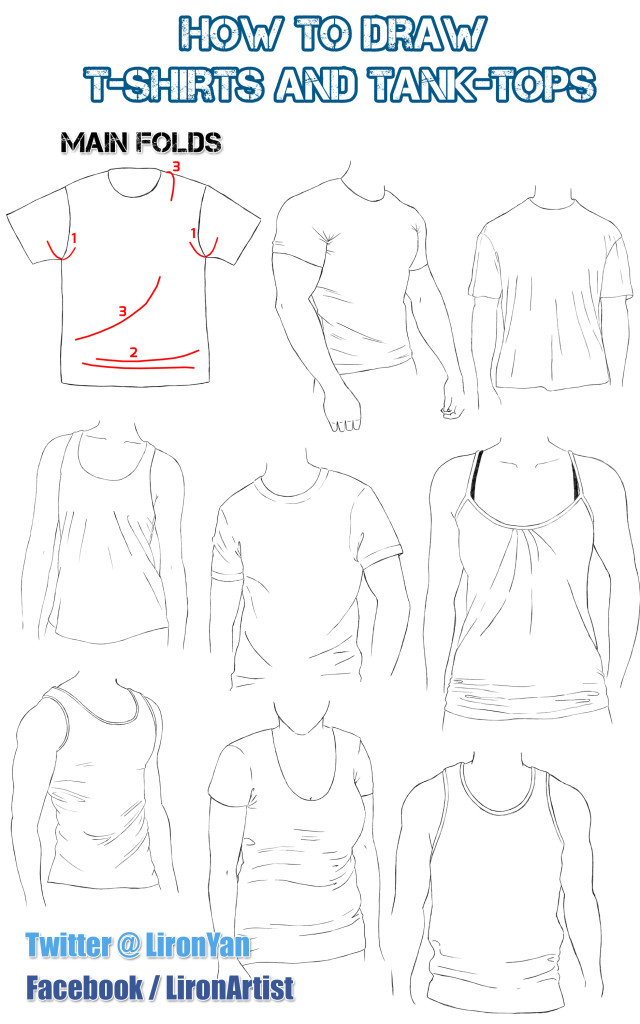
The main areas are under the arms and near the waist. These are the areas in which there is excess cloth. This cloth tends to bunch up. That’s the way folds are created (=
2. Learn where the shadows go.
I haven’t gotten into shading in this specific example. But – shading is crucial for making the folds POP and look good.
Set up a light source, and then draw the shadows accordingly.
I’ll definitely publish a conclusive video on shading in the not-so-far-away future.
Anyway, that’s the most important things to take from this. hope you enjoyed the lesson, and learned how to draw a shirt yourself.
Be sure to SUBSCRIBE to my blog (ON THE LEFT), or via my Get Awesome Stuff page! You’ll get my eBook for free + great tips and advice on drawing! (=
And I’ll talk to you soon,
– Liron