How to Draw a Clenched Fist

Hey friends!

In this drawing lesson I’ll show you how to draw a clenched fist!

The key takeaway here is to try to simplify the shape of the hand, and use simple guidelines that will eventually turn into more complex shapes.

Check out the drawing lesson here: How to Draw a Clenched Fist!

Pay attention to the thumb, and how it obstructs some of the fingers.

Also, the main challenge in drawing the hand here, was getting the correct shape of the inner parts of the fingers.

Notice how they are bent downwards, and into the center of the palm.

I hope this was helpful!

If you enjoyed this video lesson, let me become your personal, on-email, drawing teacher (=

You can do that, for FREE, right here

You’ll also receive a gift book (=

how to draw a clenched fist

I hope to hear from you soon!

– Liron

How to Draw Shay Cormac VS Adewale (AC Rogue)

Hey there!

Today I want to do something special.

In this video I show you how to draw a battle scene between Shay Patrick Cormac and Adewale – two characters from the Assassin’s Creed Rogue video game.

This is less of a drawing lesson, and more of a speed-drawing demonstration of my complete drawing process.

You’ll see everything from drawing, to painting (watercolors AND colored pencils) and inking.

So without further ado, here it is!

A few notes:

1. I like to paint before I ink.

This is something I talked about before.

This type of process allows the colors to really shine, and then also allows you to be minimal with your pen and ink.

2. I mix watercolors with colored pencils.

I like the look I achieve by applying watercolors and then completing the look using colored pencils.

This is a common practice, and is my favorite way to go. The watercolors easily cover large surfaces and give the base tone. Then, the colored pencils add the texture and more accurate shading.

However, you are invited to try a different way, and let me know if it works better for you (=

Anyway, this is it. Let me know if you have any questions!

And if you want to become a king at drawing, inking, painting, sketching and whatnot, be sure to subscribe here. You’ll also receive my book as a gift! (=

3D-Cover-PNG-DS2

I’ll talk to you soon,

– Liron

How to Draw a Head in Profile View (Female)

Hey friends!

In this drawing lesson I’ll teach you how to draw a head in profile view, in a step by step manner.

My reference was a woman, and so some of the features will be gentler, but for the most part, the process is similar to drawing a male head.

Now, I will say this – this is one way of drawing a human head. It’s not even necessarily MY way.

I tend to prefer to simply draw what I see (=

But I understand that for many people it’s easier to draw using guidelines.

Check out the video, and then keep reading for some more tips:

I think everything here is mostly self-explanatory, but here are some of my key takeaways from the video:

1. One of the more important relations here is to understand where to place the chin and the jaw line.

From my experience, if you divide that initial circle into quarters (like we did), or even thirds, you’ll find that the chin is about a quarter-third below the circle.

In this example it was about a quarter.

2. Pay attention to the ear and the eyes.

If you draw a straight horizontal line from the ear, to the left, you’ll find it’ll be in-line with the eyebrows, or sometimes the eyes.

3. The mouth. A good rule to follow is, that the mouth is around the same height as the lower edge of the circle.

That’s mostly it.

The real challenge is playing with these guidelines and rules, trying to draw the head from different angles.

I recommend reference, as always! There are many many good images on Pinterest, that you can use as reference for drawing heads, the entire human figure or anything else you’d like to draw.

This is it for today!

Be sure to share any questions you have in a comment below, and subscribe here to get MY PERSONAL GUIDANCE (free!) + my book as a gift!

3D-Cover-PNG-DS2

And I’ll talk to you soon,

– Liron

How to Draw Realistic Braids!

Hey friends!

A lot of people have been asking me how to draw hair, realistic hair and especially braids.

Well, for you girls and boys – in this drawing lesson we are going to learn how to draw realistic braids! (=

I think there is something in the challenge of drawing braids, that attract aspiring artists to it more than other “simple” hair styles.

P.S. notice how I am a little sick! I partied too hard on our independence day here in Israel, and slightly blew my voice =P So you’ll have to forgive me for that.

Okay, first – watch the videos on how to draw realistic braids! (=

Part 1:

Now part 2:

After you watched these, you might want to read on for MY key tips on this topic…

Key tips on how to draw realistic braids

#1 – Contrast!

In realistic drawings, one of the key elements is good use of contrast.

If the dark areas in reality are black, you want to get them as pitch black in your drawing.

If the highlights are perfect white, don’t settle for paper-white. Use a gouache to get a perfect white. If the… you get the point (=

I’m nowhere near master in realism drawing just yet, but these are some of my experiences.

#2 – Be the man with the plan (or the woman with the plan…)

Draw some guidelines that’ll help you later on.

This is especially important when drawing braids, as the hair will be divided in a certain way.

You want to understand the natural direction in which the hair flows, as well as the way it’s divided / sectioned, according to the specific hairstyle being worn.

#3 – Hairs and strands!

Now comes the grueling part of actually drawing the single strands of hair.

Remember – there is a direct correlation between this step, and the final result. If you’ll put in the time and effort on each single strand – it will show!

I personally still have a hard time really taking my time and focusing on the tiny details WHILE FILMING AND TALKING ^_^

This is something I’ll have to get over haha…

And I think that wraps it up. Let me know if you have any questions or comments!

Also, I’m really trying to grow this blog and help as many people as possible. But that’s impossible without your help. So PLEASE share / subscribe on the left, and I’ll be forever grateful.

Oh, and did I mention you’ll get THIS for FREE…? (=

3D-Cover-PNG-DS2

Thanks, and I’ll talk to you soon,

– Liron

How to Draw a Drop Fold: One Way

Hey friends!

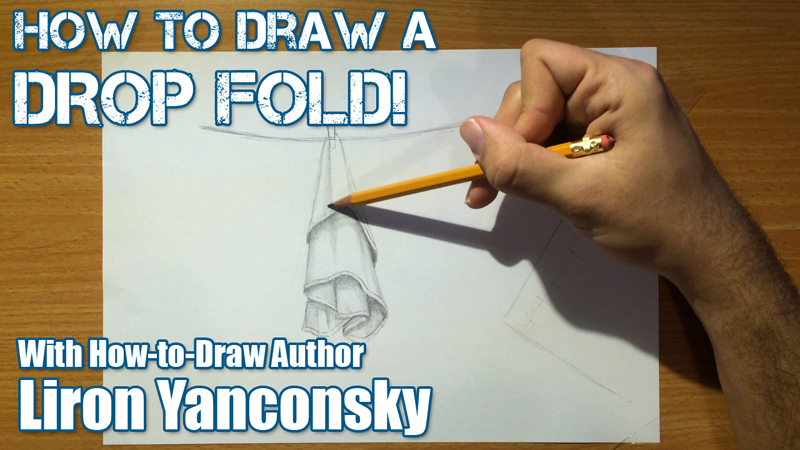
In this drawing lesson I’ll teach you how to draw a drop fold.

The drop fold is created when a cloth hangs freely from an anchor point or an anchor area.
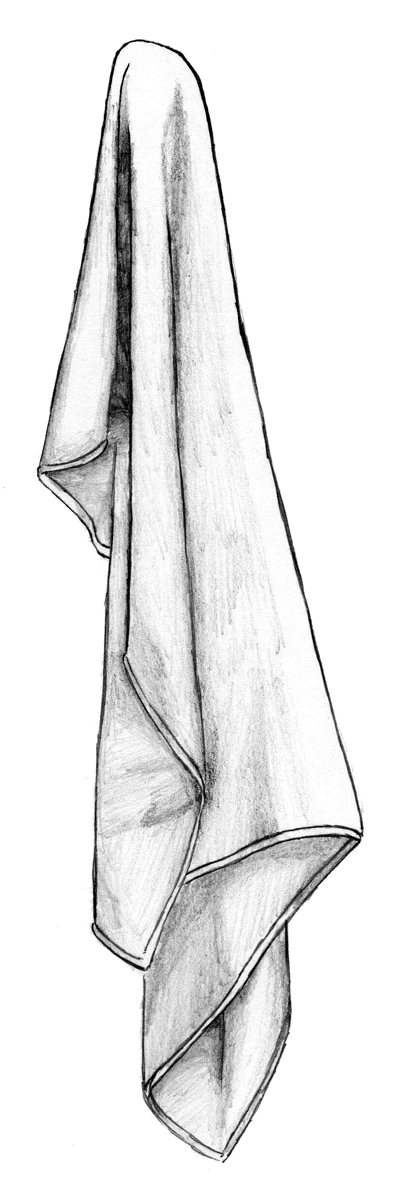
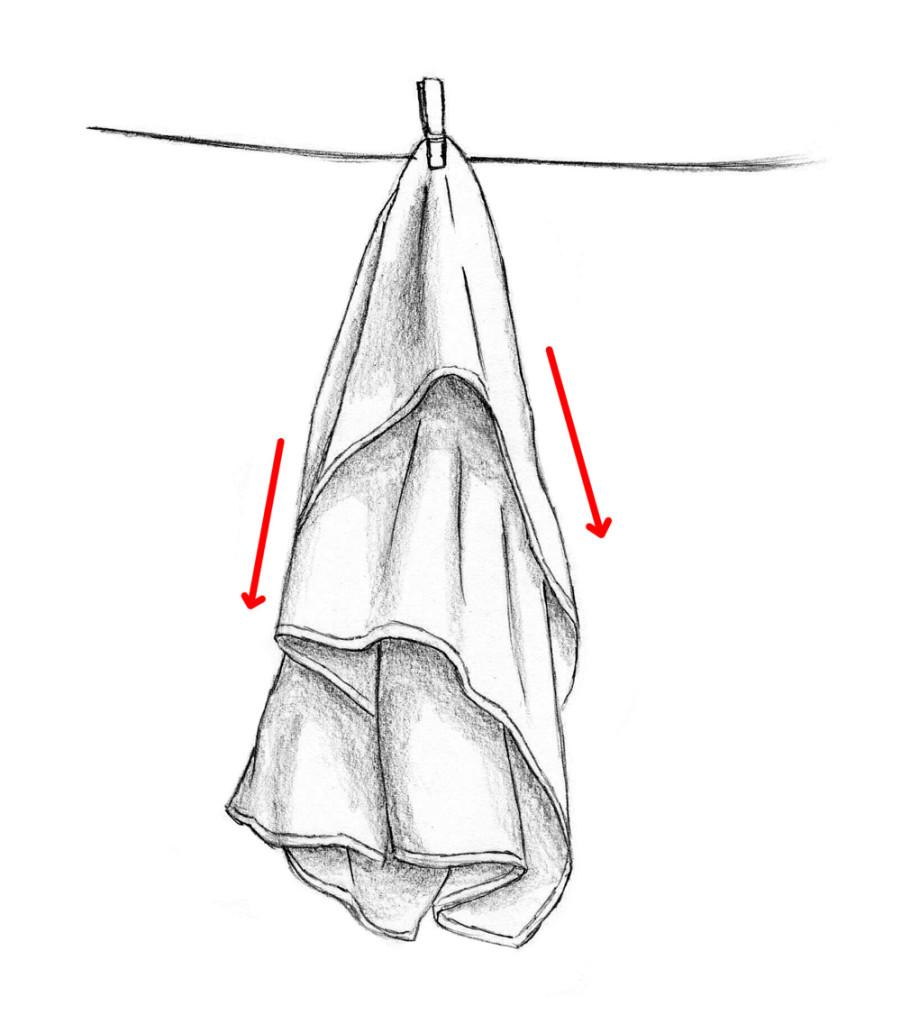
Here is an example.

Drop fold - simple example

This is a simple example of a towel hanging in the air. The only forces affecting it are gravity and the clothespin holding it in place.

Remember this rule: folds radiate from the anchor point and outwards. In this example they radiate downwards.

This fold is basic and challenging at the same time. The concept of a piece of cloth hanging loosely from an anchor point is relatively simple to grasp. There is, however, a large variety of shapes that can be created.

Here is another example of a drop fold.

How to draw a drop fold - anchor area

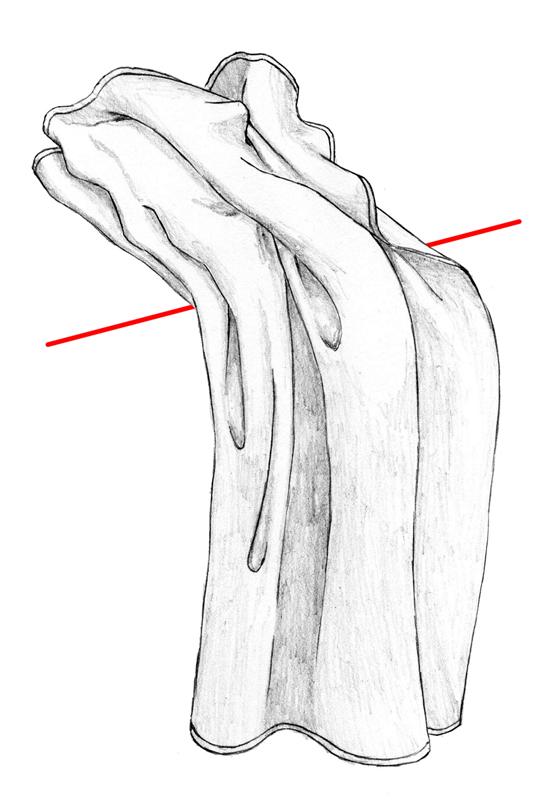
This example shows a drop fold created in cloth supported by an anchor area. The cloth is leaning against a ledge of some sort. Notice the different, hook-like shapes created in this example.

Now let’s make some order in the mess.

Drop folds, like all other folds, conform to the principles we learned earlier.

Let’s focus on two key principles:

1. The power of gravity is always present.
2. Folds radiate outwards from the anchor point or anchor area.

The most prominent characteristic of the drop fold is the direction of the fold, radiating downwards.

When supported by an anchor point, these folds tend to receive the shape of a cone. This happens because the cloth is held by the anchor point while being bunched up. As all the folds radiate downwards the cloth becomes wider and wider, taking the shape of a cone.

Here is a good example of this.

How to draw drop fold downwards

There is literally an infinite amount of drop folds, and the only way to study them is… you guessed it, using reference! (looking for them in the real world)

For this, take a towel and hold it in your hand, close to one of the edges. Hold it in the air and take a look at the folds created.

Now repeat this a few times, and notice how every time the folds look slightly different. This is the wonder of the drop fold – Basic, yet challenging.

And finally – watch my step by step video:

Keep looking for this fold in as many places possible, and slowly but surely you will be able to draw it yourself.

If you want more useful info on drawing folds in clothes, check out my book: How to Draw Folds and Clothes.

How to draw folds and clothes

Also, be sure to SUBSCRIBE to my blog (ON THE LEFT), or via my Get Awesome Stuff page! You’ll get my eBook for free + great tips and advice on drawing! (=

And until next time – take care!

– Liron