How to Draw a Head in Profile View (Female)

Hey friends!

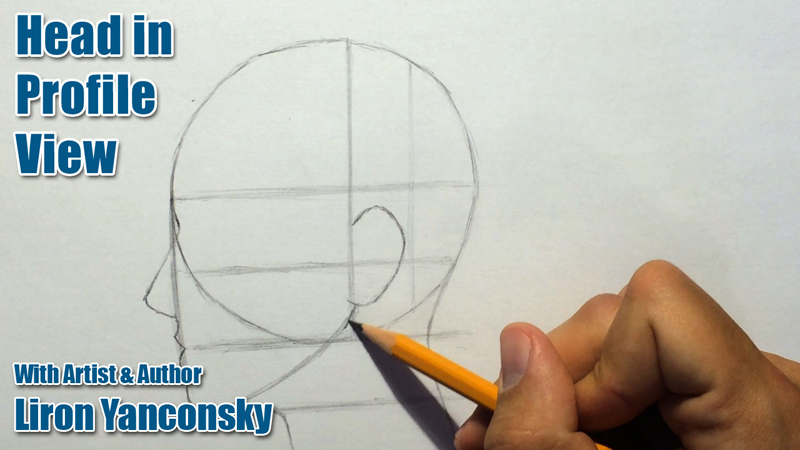
In this drawing lesson I’ll teach you how to draw a head in profile view, in a step by step manner.

My reference was a woman, and so some of the features will be gentler, but for the most part, the process is similar to drawing a male head.

Now, I will say this – this is one way of drawing a human head. It’s not even necessarily MY way.

I tend to prefer to simply draw what I see (=

But I understand that for many people it’s easier to draw using guidelines.

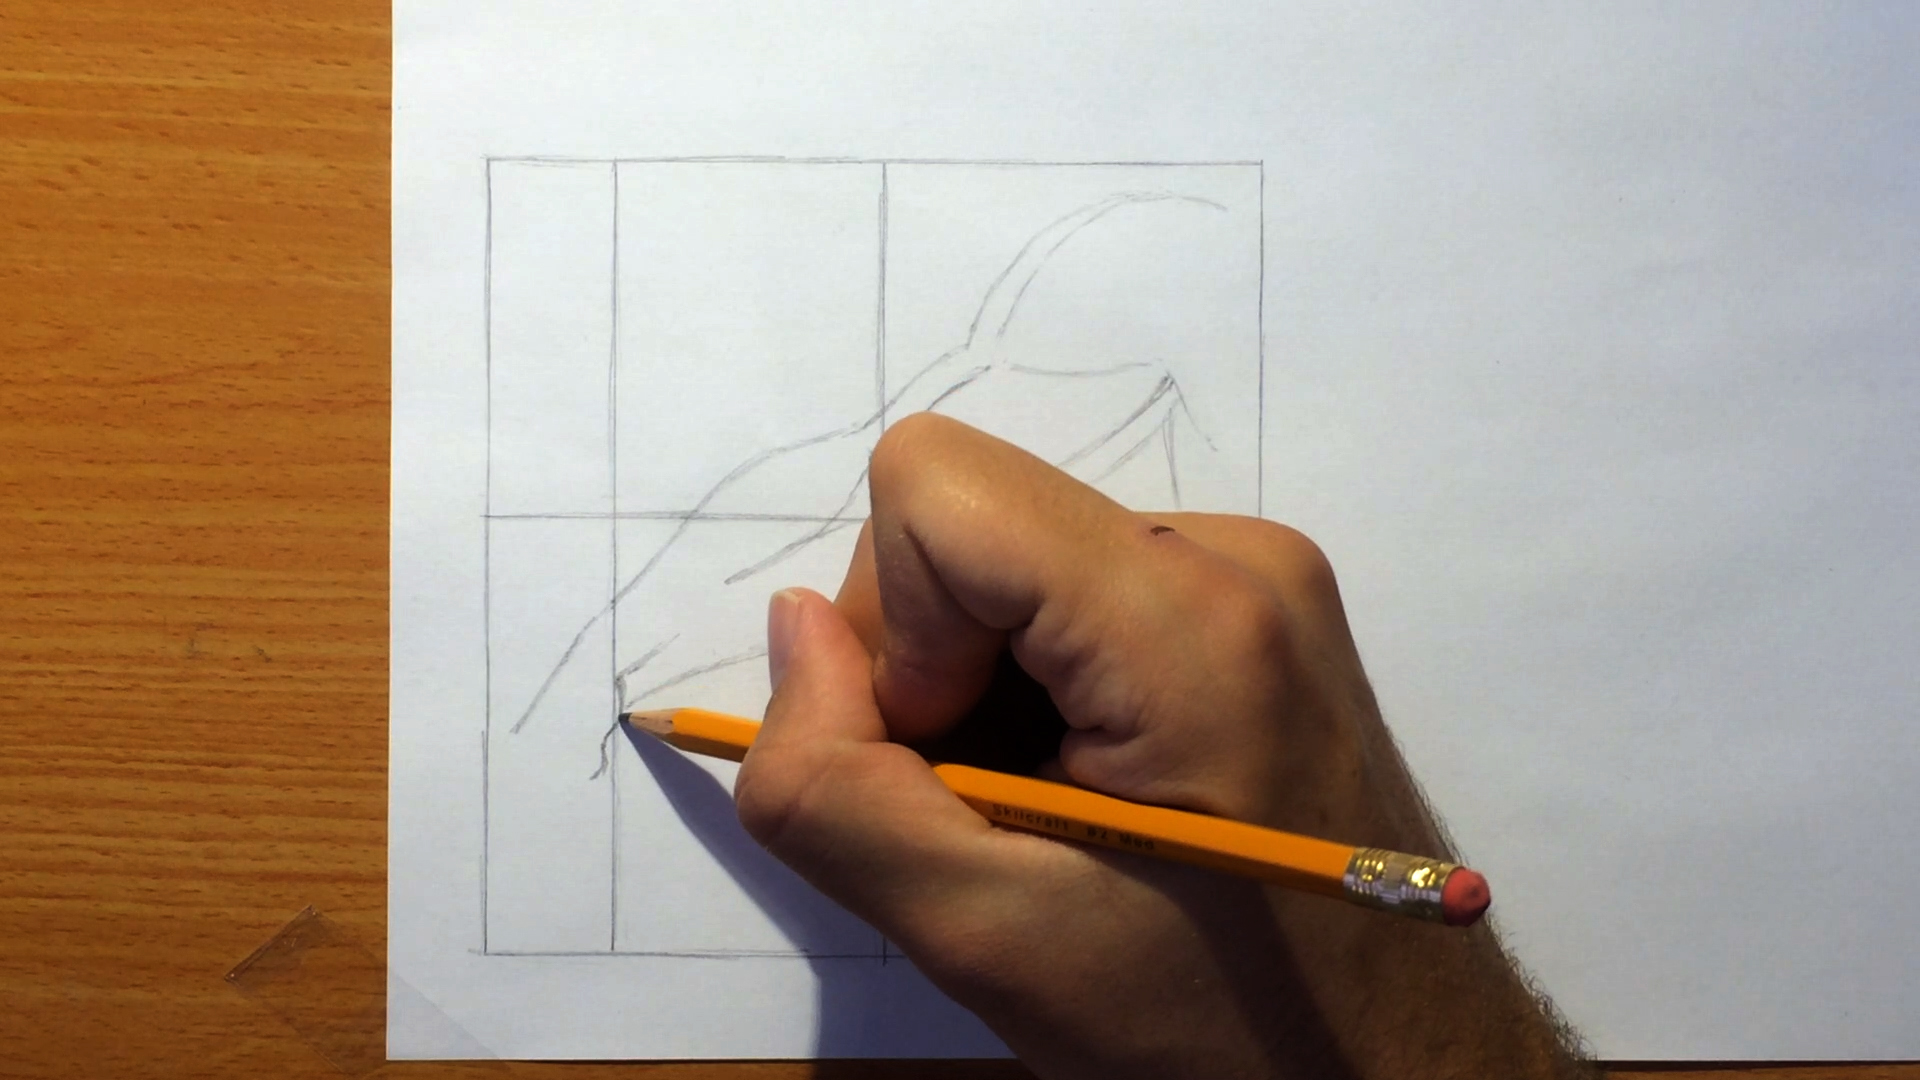
Check out the video, and then keep reading for some more tips:

I think everything here is mostly self-explanatory, but here are some of my key takeaways from the video:

1. One of the more important relations here is to understand where to place the chin and the jaw line.

From my experience, if you divide that initial circle into quarters (like we did), or even thirds, you’ll find that the chin is about a quarter-third below the circle.

In this example it was about a quarter.

2. Pay attention to the ear and the eyes.

If you draw a straight horizontal line from the ear, to the left, you’ll find it’ll be in-line with the eyebrows, or sometimes the eyes.

3. The mouth. A good rule to follow is, that the mouth is around the same height as the lower edge of the circle.

That’s mostly it.

The real challenge is playing with these guidelines and rules, trying to draw the head from different angles.

I recommend reference, as always! There are many many good images on Pinterest, that you can use as reference for drawing heads, the entire human figure or anything else you’d like to draw.

This is it for today!

Be sure to share any questions you have in a comment below, and subscribe here to get MY PERSONAL GUIDANCE (free!) + my book as a gift!

3D-Cover-PNG-DS2

And I’ll talk to you soon,

– Liron

How to Draw Realistic Braids!

Hey friends!

A lot of people have been asking me how to draw hair, realistic hair and especially braids.

Well, for you girls and boys – in this drawing lesson we are going to learn how to draw realistic braids! (=

I think there is something in the challenge of drawing braids, that attract aspiring artists to it more than other “simple” hair styles.

P.S. notice how I am a little sick! I partied too hard on our independence day here in Israel, and slightly blew my voice =P So you’ll have to forgive me for that.

Okay, first – watch the videos on how to draw realistic braids! (=

Part 1:

Now part 2:

After you watched these, you might want to read on for MY key tips on this topic…

Key tips on how to draw realistic braids

#1 – Contrast!

In realistic drawings, one of the key elements is good use of contrast.

If the dark areas in reality are black, you want to get them as pitch black in your drawing.

If the highlights are perfect white, don’t settle for paper-white. Use a gouache to get a perfect white. If the… you get the point (=

I’m nowhere near master in realism drawing just yet, but these are some of my experiences.

#2 – Be the man with the plan (or the woman with the plan…)

Draw some guidelines that’ll help you later on.

This is especially important when drawing braids, as the hair will be divided in a certain way.

You want to understand the natural direction in which the hair flows, as well as the way it’s divided / sectioned, according to the specific hairstyle being worn.

#3 – Hairs and strands!

Now comes the grueling part of actually drawing the single strands of hair.

Remember – there is a direct correlation between this step, and the final result. If you’ll put in the time and effort on each single strand – it will show!

I personally still have a hard time really taking my time and focusing on the tiny details WHILE FILMING AND TALKING ^_^

This is something I’ll have to get over haha…

And I think that wraps it up. Let me know if you have any questions or comments!

Also, I’m really trying to grow this blog and help as many people as possible. But that’s impossible without your help. So PLEASE share / subscribe on the left, and I’ll be forever grateful.

Oh, and did I mention you’ll get THIS for FREE…? (=

3D-Cover-PNG-DS2

Thanks, and I’ll talk to you soon,

– Liron

Drawing the Human Figure: Male Figure Performing High Kick!

Hey friends!

I this drawing lesson I’ll show you one way of drawing a male figure performing a high kick!!

I’ll cover the basic anatomy behind this pose, and hopefully we’ll go into more details in a future drawing lesson.

Check out the video tutorial here, and read on for more key pointers on drawing the male figure.

Okay, so here are my main advice for drawing a male figure in this pose.

1. Begin with a basic “stick figure” of the male figure.

This means we use a very simple stick figure to “find” the pose.

If you want to get any figure drawing right, you need the base to be CORRECT. It doesn’t have to be perfect, but it has to be CORRECT.

Any mistakes made in the first stages will drag on to the later stages. And in later stages, correcting these mistakes becomes very hard – nearly impossible.

Here is my basic stick figure.

Drawing the Human Figure Male Figure Drawing

2. Use simple 3D shapes to define where each body part of the male figure is.

Next I use very simple cylinders and ovals to define the limbs, joints and the core.

The reason I do this, is that it is very hard for me to go from that basic stick figure, directly into the final drawing.

I need that stage in order to find each of the male figure’s parts.

Here are my simple 3D shapes.

Drawing the Human Figure Male Figure Drawing

3. Now I can finally begin drawing the FINAL representation of the figure.

In this stage, more knowledge of anatomy IS IMPORTANT.

You want to learn where the muscles are, and their shape.

You also need to learn how to properly draw the joints, hands, feet and face.

Drawing the Human Figure Male Figure Drawing

This is a big challenge.

My advice…? Use reference!! (you must be tired of hearing this by now… =P)

Work slowly, and draw the entire male figure one part at a time. Be extra careful with the connection between the different parts.

For example – make sure to properly draw the area where the arms and the core (upper torso) meet.

And then, slowly but surely, you will be able to draw this pose!

Drawing the Human Figure Male Figure Drawing

Feel free to drop any questions you have in a comment below. I’ll answer everything.

Also, Be sure to SUBSCRIBE HERE to get my eBook for free + great tips and advice on drawing, delivered straight to you! (=

3D-Cover-PNG-DS2

And I’ll talk to you soon (=

– Liron

How to Draw a Drop Fold: One Way

Hey friends!

In this drawing lesson I’ll teach you how to draw a drop fold.

The drop fold is created when a cloth hangs freely from an anchor point or an anchor area.

Here is an example.

Drop fold - simple example

This is a simple example of a towel hanging in the air. The only forces affecting it are gravity and the clothespin holding it in place.

Remember this rule: folds radiate from the anchor point and outwards. In this example they radiate downwards.

This fold is basic and challenging at the same time. The concept of a piece of cloth hanging loosely from an anchor point is relatively simple to grasp. There is, however, a large variety of shapes that can be created.

Here is another example of a drop fold.

How to draw a drop fold - anchor area

This example shows a drop fold created in cloth supported by an anchor area. The cloth is leaning against a ledge of some sort. Notice the different, hook-like shapes created in this example.

Now let’s make some order in the mess.

Drop folds, like all other folds, conform to the principles we learned earlier.

Let’s focus on two key principles:

1. The power of gravity is always present.
2. Folds radiate outwards from the anchor point or anchor area.

The most prominent characteristic of the drop fold is the direction of the fold, radiating downwards.

When supported by an anchor point, these folds tend to receive the shape of a cone. This happens because the cloth is held by the anchor point while being bunched up. As all the folds radiate downwards the cloth becomes wider and wider, taking the shape of a cone.

Here is a good example of this.

How to draw drop fold downwards

There is literally an infinite amount of drop folds, and the only way to study them is… you guessed it, using reference! (looking for them in the real world)

For this, take a towel and hold it in your hand, close to one of the edges. Hold it in the air and take a look at the folds created.

Now repeat this a few times, and notice how every time the folds look slightly different. This is the wonder of the drop fold – Basic, yet challenging.

And finally – watch my step by step video:

Keep looking for this fold in as many places possible, and slowly but surely you will be able to draw it yourself.

If you want more useful info on drawing folds in clothes, check out my book: How to Draw Folds and Clothes.

How to draw folds and clothes

Also, be sure to SUBSCRIBE to my blog (ON THE LEFT), or via my Get Awesome Stuff page! You’ll get my eBook for free + great tips and advice on drawing! (=

And until next time – take care!

– Liron

How to Draw an Arm: Male Figure

Hey friends!

In today’s drawing lesson I’ll teach you how to draw an arm of a male figure.

We’ll do this step by step, so you understand exactly how to draw the arm’s shape, including the muscles and the hand.

Check out the full video tutorial, or read on if you prefer text instructions (=

1. The Setup

I have a square that is 5.2 inches long on each side.

how to draw an arm

 I divided it into 4 relatively equal parts, using two lines: horizontal and vertical.

In addition, there is another vertical line dividing the left half into a third and 2 thirds.

2. Beginning to Draw the Arm

Begin drawing the shoulder muscle, as well as the muscle “hidden” behind it.

how to draw an arm

The arm is facing towards us (while the hand is turned downwards). In this angle – these are the muscles we get to see.

3. Another Muscle

Add another long, oval-shaped muscle that begins below the shoulder muscle, and ends in the center of the square.

how to draw an arm

4. Lower Part of the Arm

Next it’s time to add the lower part of the arm.

I will mention how I am, as always, using reference for this. I still can’t draw these things entirely from imagination.

how to draw an arm

Actually, drawing this from memory is quite an amazing feat, that not many possess.

5. The Hand!

Hands are a well-known landmine for artists – but fear not! By using reference you are already somewhat immune.

In this angle, the hand is pointing downwards. We also see its inner part, and so the thumb is pointed towards us. There is some foreshortening going on too.

I begin with the area of the thumb.

how to draw an arm

Notice how the entire hand is going to be contained within that left-most third.

Next, I start drawing the fingers one by one. Make sure to have them pointing at slight different angles. This creates a natural look.

how to draw an arm

Notice how I made the pinky point in a very different direction than that of the other fingers. That’s a nice little effect that helps convey looseness, and the absence of tension in the hand.

By the way, I believe I made the hand a tiny bit too small, but I’m still pleased with the result.

6. Let’s Add Some Shading

This is what’s going to really give the muscles their shape and volume.

how to draw an arm

And this is it! Here is the final scanned result:

how to draw an arm

I hope you enjoyed this lesson, and learned how to draw an arm. Feel free to leave a comment or ask a question below (=

And as always, Be sure to SUBSCRIBE HERE to get my eBook for free + great tips and advice on drawing, delivered straight to you! (=

3D-Cover-PNG-DS2And I’ll talk to you soon,

– Liron